Saturday, October 24, 2015

Sewing for Baby: Leggings and Matching Headband


I am happy to be back today with another installment of the Sewing for Baby series.  Today I am sharing a post on leggings with a bonus portion about sewing a matching headband.  A few posts ago I talked about our experience with cloth diapering so far.  You can read that post here.  I am happy to say that cloth diapering has been continuing to go wonderfully for us.  I am not looking forward to having to buy disposables again when she goes to daycare starting next week.  One of the deterrents for cloth diapering for some people is the fluffy bum that the diapers create.  I think it is adorable but it does occasionally make finding pants that fit challenging.

When I found a free pattern for Baby Got Back Infant/Toddler Leggings by Lauren Dahl from Baste + Gather, I knew I had to try making a pair (or 7).  I mean the name alone is awesome enough. Basically the pattern has an extra piece in the bum area of the leggings to allow room for the fluffiness of the cloth diapers.
Any stretchy knit works great with this pattern.  I have made 3 pairs so far all with fabric from Girl Charlee.  Here are the fabrics I have used:
Black Red Cream Buffalo Plaid Cotton Jersey Blend Knit Fabric
Feathers on Silver Peony Cotton Jersey Knit Blend Fabric
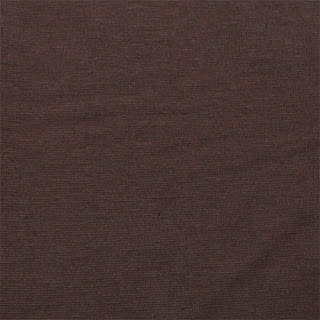
Dark Chocolate Brown Solid Ponte de Roma Fabric

I made a pair with the feather fabric first but I made it in the 3-6 month size and it was were way too big for her (she will wear it eventually).  I cut the pattern down to the 0-3 month size and made a pair with the Ponte de Roma fabric next.  I really liked using this fabric because it has such a nice weight to it so in the future I plan to make more pairs with it.  This pair was still a little big and quite long. With the buffalo plaid pair I shortened the legs slightly, adjusted the rise of the paints so they weren't quite so high, and made the leg openings narrower.  Even with having to make adjustments, these leggings were very easy to put together.  Every baby is different so having to make some adjustments is expected.  You don't need a serger for this project but I loved how professional it made the leggings looks.

For the headband, I loosely followed this tutorial from The Sweeter Side of Mommyhood blog.  I cut the fabric to the measurements in the tutorial and cut a point on both ends like in the tutorial.  Instead of zigzag stitching the headband I just serged the edge leaving half of one of the points open.  I turned the headband right side out and top stitched the opening closed.  Lastly, I just tied the headband and voila, it was done.

I love the two photos above because they show just how obsessed she is with her feet.  In fact, as I am writing this her daddy is holding her and she is bending forward and drooling on her feet.  She wants them in her mouth so badly!

Next up on the blog: Lyla's Halloween costume which includes the leggings that I made with chocolate brown Ponte de Roma fabric.  Here are the other posts in the Sewing for Baby series:


Tuesday, October 13, 2015

Baptism Brunch + Welding Text with Silhouette Software

This past Sunday was my daughter's baptism and we decided to throw a little brunch party at our house for our families and Lyla's godparents afterwards. I wanted a simple celebration but I also wanted it to look pretty.  I decided to go with burlap, lace, and vintage elements for my decor.  Of course I am generally obsessed with those things anyway but I was inspired by Lyla's baptism gown made by her father's grandmother that her father wore when he was baptized.  

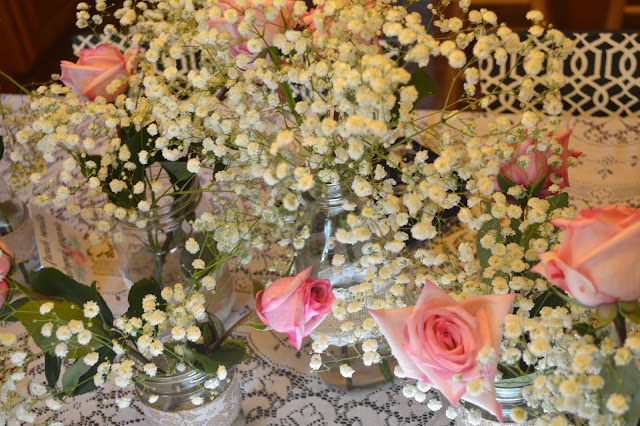
For the decor I borrowed two lace tablecloths from my mom and covered the table and part of our kitchen counter with them.  I made a "God Bless Lyla" center piece out of cardstock with my Silhouette Portrait which I will get to later in this post.  I found burlap and lace ribbon at Hobby Lobby and Michaels and used it to decorate jars that I had on hand.  I put baby's breath and pink roses in the jars. I found a cute thing at Michael's for the plates and napkins and I put the spoons for the yogurt in the creamer portion of a vintage silver tea service.  I also used a vintage teacup to hold the chocolate chips in the yogurt bar.  The decor was really simple but it looked so pretty.


I decided to go with brunch food because so many things can be made ahead of time. Here is what I served:
Baptism Brunch Menu

I love a cute make-your-own bar idea like my hot chocolate bar at our New Year's Eve Party so I thought a yogurt parfait bar would be a fun and easy addition to the brunch.

I bought some plastic cups for the yogurt and three large containers of vanilla yogurt.  For the add-ins for the parfaits I had blueberries, strawberries, raspberries, almonds, walnuts, mini chocolate chips and three types of granola which I picked up in the bulk foods section at the grocery store.  I made some cute signs for the granola as well as a "yogurt parfait bar" sign with the Silhouette Design software and made it into a print and cut design.  If you missed my last post on making print and cut custom wine labels with the Silhouette Portrait then click here to see it.

I arranged the cupcakes into a cross shape.  I loved this recipe because the frosting was a lovely pink shade from the 3 tablespoons of maraschino cherry juice in the recipe.


Also the cupcakes were so delicious.  It is some of the best frosting that I have ever had and I am not a big frosting person.

Alright, now on to the tutorial portion of this post.  The weld option in the Silhouette software is a very useful tool especially when cutting script text.  I wanted to make a centerpiece for the table that said "God Bless Lyla" using glitter card stock and I wanted it to be all one piece.
I started by finding a font I wanted.  I used the font Lavanderia which was a free font that I downloaded. After typing my text (I made sure the words were 3 separate objects) I selected the word.
I needed the capital letters to touch the lowercase letters otherwise they wouldn't be welded together. In order to do this I had to ungroup the letters.
Once I ungrouped them I was able to move the capital "G" so that it was just slightly overlapping the "o."
After selecting all 3 letters in the word, I went to the object menu, then modify and clicked weld from the modify window.
Now you can see that the letters are all connected.
I did the same thing with the other two words.  Once they were welded, I put the 3 words together so that they were overlapping in at least one place and then welded the words together.  
I now had one connected piece.
Next I rotated the words 90 degrees and enlarged them to fill almost the entire area.
I cut the design out on glitter card stock.  I find it easier to cut out designs on the glitter card stock when I have the non-glittered side facing up on the Silhouette mat.  Because of this I had to mirror the design vertically.
Now the design was ready to cut.
To finish of the centerpiece I glued two wooden skewers to the back of the card stock.  Then I put some floral foam surrounded by moss into two jars and stuck the wooden skewers into the floral foam.  I glued pieces of the burlap and lace ribbon around the jars.  

It was such a fun little celebration of a big moment in our daughter's life.  I loved how everything fit so well with the vision that I had in my head for the day.  I still have more posts for you during this lovely month of October including my daughter's adorable diy Halloween costume so please visit my blog again to check it out.  

Thursday, October 1, 2015

Custom Wine Labels Using Silhouette Print and Cut

Today I have a post that is, *gasp*, not about my child.  I know shocker right.  This also happens to be my 100th post!  I cannot believe that I have completed so many projects over the last 3 years.  A few weeks ago, a friend of mine asked me to help her make some custom wine labels and I knew that it would be a breeze with my Silhouette Portrait.  I made 3 wine labels to show different uses for this project but there are so many other possibilities as well.
I started by making a rectangle that was roughly 3.75" by 4.5".
I then designed my labels using different shapes, clip art, and text.  The first step to making the text or shapes filled for a print and cut design is to highlight the shape and open the fill color window. Then you can select the color from the basic options or make your own color using the advanced options.
Next open up the line color window and select the "no line" box.  You could leave that line there, it won't print on your printer, but it is easier to visualize the finished product without it.
After finishing my designs, I opened up the registration marks window and selected "type 1" to add the registration marks.  I could only fit two labels per sheet.  I then sent the design to my printer.
Once they printed I put them on the mat and loaded the mat into the machine.  I selected my media, set my blade, and made sure to select "cut edge."  If you don't select "cut edge" the machine will cut out every individual letter and shape.
Then all that is left is to put the labels on the wine bottles or in this case sparkling cider bottles.  We didn't have any wine at home and I didn't want to take the baby in the liquor store with me.  I also had an ulterior motive to make sparkling cider floats with cinnamon ice cream.  Mmm apple pie float. You could also make smaller labels for soda bottles with this project.  Let me know what you think of this project and your ideas for how to use these labels.  I have so many posts and projects bubbling in my head so check back frequently this month because I will have lots more for you!
Related Posts Plugin for WordPress, Blogger...