Friday, March 6, 2015

Dr. Seuss Thing Maternity Shirt

March 2nd is Dr. Seuss' birthday and elementary schools around the country celebrate by participating in Read Across America Day.  Our school celebrates with a whole reading month which is kicked off by a week of fun dress up days for the students (and staff).  On the last day of the week the dress up theme is dress up like your favorite Dr. Seuss character.  In the past I have been a Thing and a Star-Bellied Sneech.  This year I decided to be a Thing again but I thought it would be fun to include baby in the fun.  This of course was a perfect project for my Silhouette Portrait so I opened up the software and got to work.  

 My medium of choice for this project was heat transfer vinyl.  I started by finding Thing 1 and Thing 2 images on Google and then I just dragged them to the desktop of my MacBook and then dragged them into the Silhouette software.  Then I opened the trace window and selected the image and clicked trace.

 After dragging the original image out of the way, I selected my traced image and selected release compound path from the object menu.  This allowed me to get rid of all the unwanted parts of the image.
I really just wanted the thing word and the number.

I put the shirt on to figure out what sizes to make the circles and then drew them in the Silhouette software.

I then copied the circles and made a smaller circle on the inside to create the border of the circle.  I also resized the "thing 1" and "thing 2" so that they would fit inside the borders.

Then I made sure to mirror the "thing 1" and "thing 2" since I was using heat transfer.  

I cut out the center circles out on white heat transfer vinyl and the rest of the shapes out on black glitter heat transfer.

I also cut out the inner circles on card stock so that I could make sure I got the placement right.  I found this read shirt at Target.  I love their v-neck tees because they are so soft and comfy.  They aren't maternity but I can still fit fine in a size large since I am only about 20 weeks.
I started by ironing on the white circles.  You need to make sure to put a piece of cotton cloth between the iron and the heat transfer.
Then I added the black borders.  I heated the white layer for about 20 seconds (with the cloth in between the iron and the heat transfer of course) before applying the second layer.  
I repeated this step with the "thing 1" and "thing 2" layer.  
It was so fun to wear this shirt at school today.  My favorite comment came out a conversation with some of my 1st grade students.  
1st Grader #1: Why are you Thing 1 and Thing 2?
Me: Well I am Thing 1 but who do you think Thing 2 is?
1st Grader #2: Your belly?
It was so funny!  They finally figured out that it was because I was pregnant which elicited my 2nd favorite comment of the day: Is it a real baby in your belly?  One of the best things about being an elementary music teacher is how entertaining the students are with what they say and do.  

Well I don't know what my next post will be yet but I am guessing it will be nursery related so hopefully it won't be too long before the next post!

Monday, March 2, 2015

Office Update

I've taken a little break from nursery stuff to work on a project that I decided wouldn't get done if it weren't done before baby comes.  We use the 3rd bedroom in our house as an office and I was sick of the purple wall color of the room.  I mean, I love the color purple but not this shade on all 4 walls of a small room.

I decided that a pale mint was the color that I envisioned for this room and after putting 6 different swatches (that looked remarkably similar) on the wall I decided on Behr Mint Fizz.  I am not disappointed in my choice at all but unfortunately none of my pictures do it justice.  Also painting the room made me aware of all the other things that I still want to do in this room.  So I decided to label the photos with some ideas that I have for the room.


Maybe these pics would have been better in daylight.  Oh well.  Just trust me that the wall color is a beautiful pale mint green.  By the way this small room has four doors, with 2 closet doors and a bathroom door in a addition to the main door!  They are all in the same area too.  If I had taken that last shot a little wider you could of seen all of them!  Just a random fact for you.

In nursery news, a few weeks ago I decided to tackle the 2 giant closets in the room.  There was a lot of stuff in those closets that didn't need to be in there.  In fact there was a lot of stuff that didn't need to be in our house period so this past weekend we took a massive load to the local charity thrift store for donation.  I have also been on the search for a dresser which was beginning to frustrate me.  I had this vision of a midcentury modern piece but finding something for under $150 that would make a good baby changing station and fit in the room was a challenge.  But I am happy to say that I found a lovely 1950's dresser that is absolutely perfect for $125 and I look forward to sharing pics once it is in the room.  We also ordered the crib and I will share that once we have it set up as well.  Now our job is to move the bed out of the room so that we have room for the crib which comes tomorrow!

I have a fun post on layering heat transfer material with the Silhouette for you guys for this coming weekend so you have something to look forward to!

Thursday, February 12, 2015

Slipcovered Glider for the Nursery

This post is shared on That DIY Party 

At the end of my last post I told you that I had gotten a start over the weekend on recovering the glider for the nursery.  I had also said that it would probably be a long time before I posted because the project would take me a while because it was complicated.  I am happy to report that it was not nearly as complicated as I thought it would be and I actually finished the project on Tuesday night!
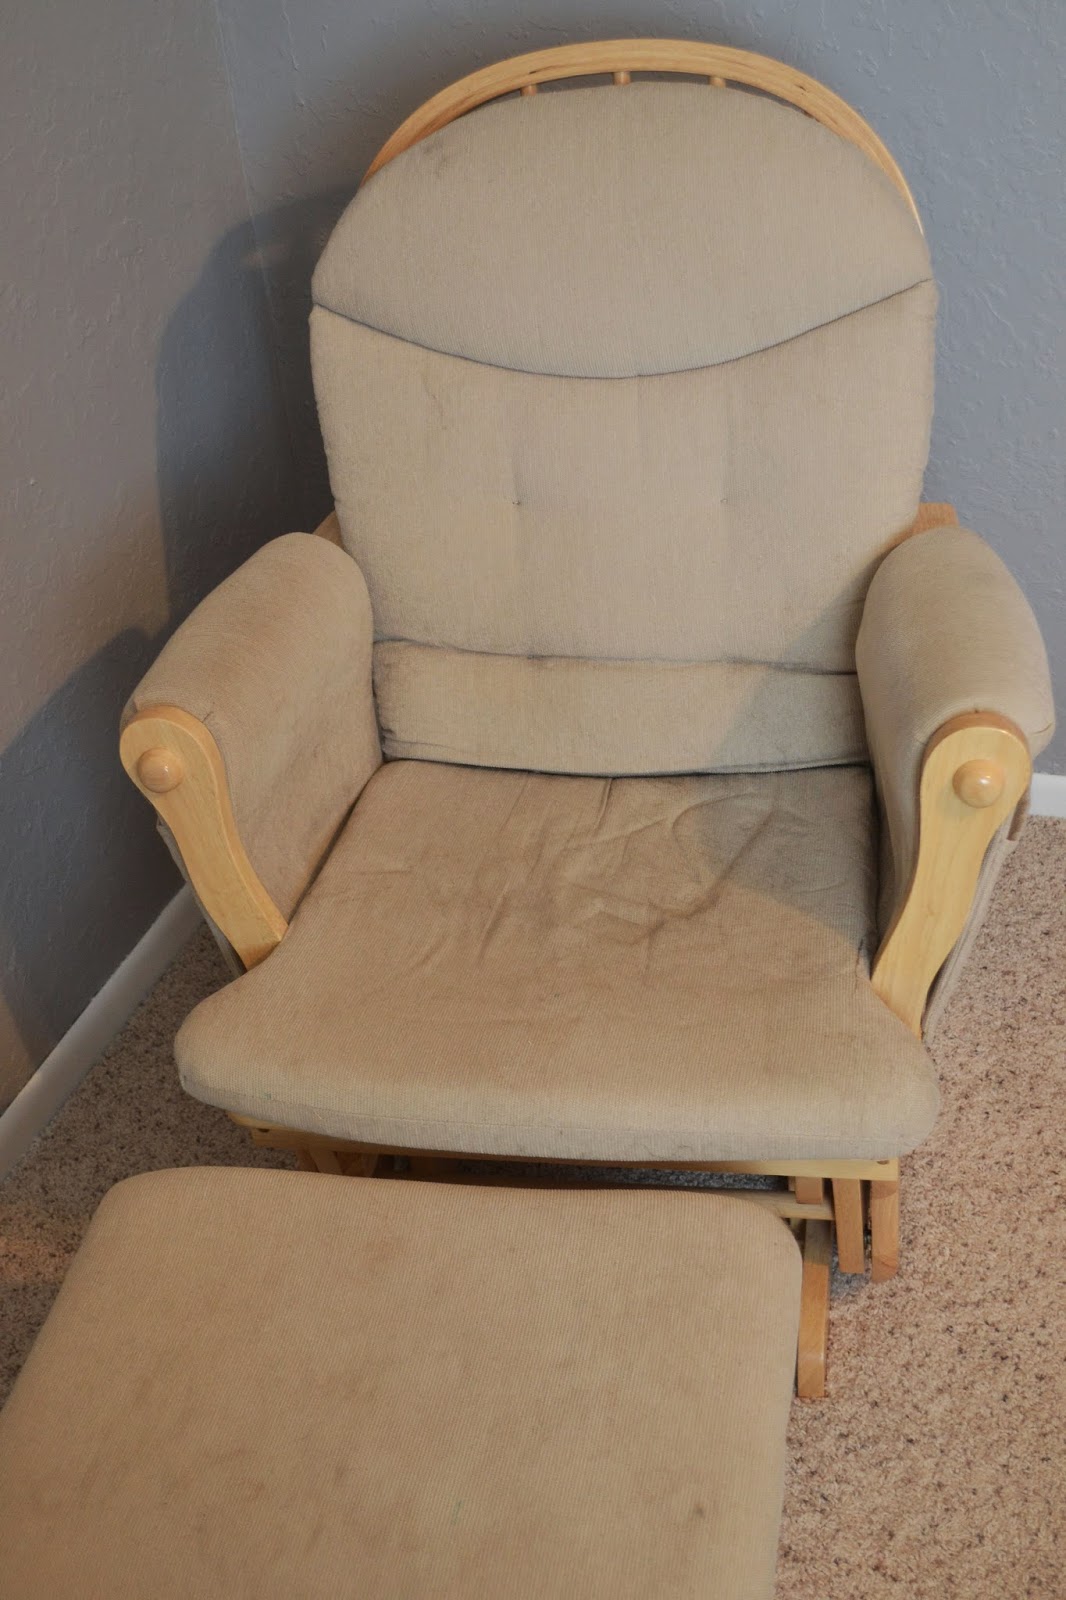
I bought this glider several years ago for $20 at a thrift store.  Other than some ugly and stained cushions it is in perfect condition.  It took a lot of will power to leave it as is for so long so as soon as my 1st trimester fatigue was gone, I was ready to get started on this thing.  I scoured the blogosphere for tutorials on how to recover gliders and finally decided on this excellent tutorial from a blog called Runs With Spatulas.
I am not going to include detailed pictures of the process in this post so you will have to use her tutorial if you want to replicate this project.  I like this tutorial for several reasons.  First of all, it is one of the most detailed sewing tutorials I have ever come across.  Every single step is detailed with pictures and written instructions.
Secondly, every piece is removable so it can be washed.  I was intimidated by all the zipper sewing that goes along with this but because of the detail of the tutorial I was able to successfully and easily install 4 zippers!
I did do a few things differently than the tutorial however.  First of all she made ties to attach her cushions to the back of the chair but I just decided to replicate the velcro straps that were attaching my glider cushions.  I measured the original ones and then used some fabric scraps to make them. Make sure to sew the velcro on opposite sides of the fabric.  I made this mistake once and had to get out my old friend the seam ripper.

Another thing that I did differently than the tutorial was how I covered the ottoman.  She made a cover with elastic that was removable.  I didn't know how well that would stay on while feet were resting on it and rocking so I decided to just staple my fabric on.  I figured that would be the piece that would be the least likely to get dirty anyway.

Well I suppose I should get to the big reveal.  Here is a reminder of what I started with:
And here is the glider now:

Here is a cost breakdown for this project:
Glider-$20
4 yards of fabric-$42
Zippers and Thread-$13
So this entire project ended up costing me only $75! Not too shabby.

If you are wondering what color the fabric is, it is in fact navy.  It reads a little black in the photos in the nursery but it definitely looks navy in person.  Also, I found that adorable fox pillow at Homegoods.  Isn't it cute?  I am not sure what project I will be working on next but hopefully I won't make you wait too long for another post!

Sunday, February 8, 2015

Baby Announcement Gifts

I am back today with a post on the gifts that I gave to my family to announce my pregnancy.  I told my parents pretty much right away but I waited until Christmas to announce it to my brother and sisters. I was 10 weeks at the time.  I thought it would be a cool idea to announce it through Christmas gifts so I scoured Pinterest for ideas.  First, I found these great necklaces from an Etsy shop: JennsHandmadeJewelry.  

You can choose the bead and chain that you want so I chose a pearl bead for each of the necklaces that I purchased.  I love the simplicity of the design.  And the bonus was a great price and fast shipping.

It was a little bit harder to figure out a gift for my brother but I finally decided to make a stenciled ceramic mug.  I also made one for my dad.  I designed the stencils in the Silhouette software.
It took some experimenting to figure out what size would be right for mugs.  I made a little stencil so I could do a little test with the paint first.  I used adhesive vinyl for the stencils.
I found the mugs at Michaels.  They came with cute little ceramic spoons but I broke one of them :(. I used the broken spoon to test the paint with the stencil.
I had considered using sharpies for the mugs but I found mixed reviews on the durability of sharpies on ceramic mugs so I decided to use Martha Stewart glass paint instead.  I purchased the paint at Michaels as well.

I placed the stencils on the mugs.  I made sure that their weren't any bubbles or wrinkles in the stencil.  It takes some time to get it on there perfectly because of the curve of the mugs.  I did end up with a tiny wrinkle in the Grandpa mug but it didn't affect the design at all.
I then used a small stencil brush to apply the paint.
I didn't let the design dry completely before I removed the stencil because in my test I found that the paint would peel off with the vinyl if it was too dry.
I then followed the online directions for curing the paint in the oven.  I am not completely sure that the paint is dishwasher safe so I would hand wash the mugs.
I love the way that they turned out.  The gifts were such a fun way to announce our pregnancy to my family.  My brother and sisters are all teenagers so their reactions were pretty muted (typical teenagers) but it was still fun.  I have started on the glider chair this weekend and I can't wait to share but unfortunately it will probably be a while because it is a complicated project.  Hopefully it won't take me too long!

Friday, February 6, 2015

A Small Living Room Update

I am back today with a tiny update to our living room that involves the curtains.  I believe that the living room curtains were actually my first sewing project for the house.
I liked the way they looked a lot but after making the grommet curtains for the bedroom I decided that I wanted grommets in the living room curtains as well.
So here is a look at the living room curtains now:


Just try to ignore the clutter and the sleepy cat in the photos above.  I just wanted to get a quick blog post done so they aren't my best photos.  

You may have noticed a few less blog posts than normal lately.  That is due to the fact that I have been very tired the last few months and haven't completed very many projects.  And the reason for this tiredness is (drumroll please)...


I am beyond excited about this!  And now that I am a few weeks into my 2nd trimester and most of my energy has returned I am ready to get started on the nursery.  I have been pinning ideas to a secret Pinterest nursery board for a long time.  Actually, I have to admit that I created the board well before we found out that I was pregnant. 

My first project will be to create slip covers for the chair pads on a glider chair that I found for $20 at a local thrift store.  I found an excellent, detailed tutorial that will hopefully make it easy (it involves zippers which is not my forte so there may be a little frustration involved).  The fabric should be arriving today so I hope to get started on it this weekend.  Here is the fabric that I will be using:

I will also be back this weekend with a post on some Christmas gifts that I gave to my family to announce our pregnancy!


Sunday, January 11, 2015

NYE Party Take 4

This New Year's Eve we hosted our 4th party.  3 of the 4 parties have been hosted at our current house.  You can read about last years party here.  This year I kept the decor pretty much the same and also included a photo booth again which you can read more about in the post from last year.  What I always change up a little bit is the menu.  So this blog post is a look at what I served at the party.
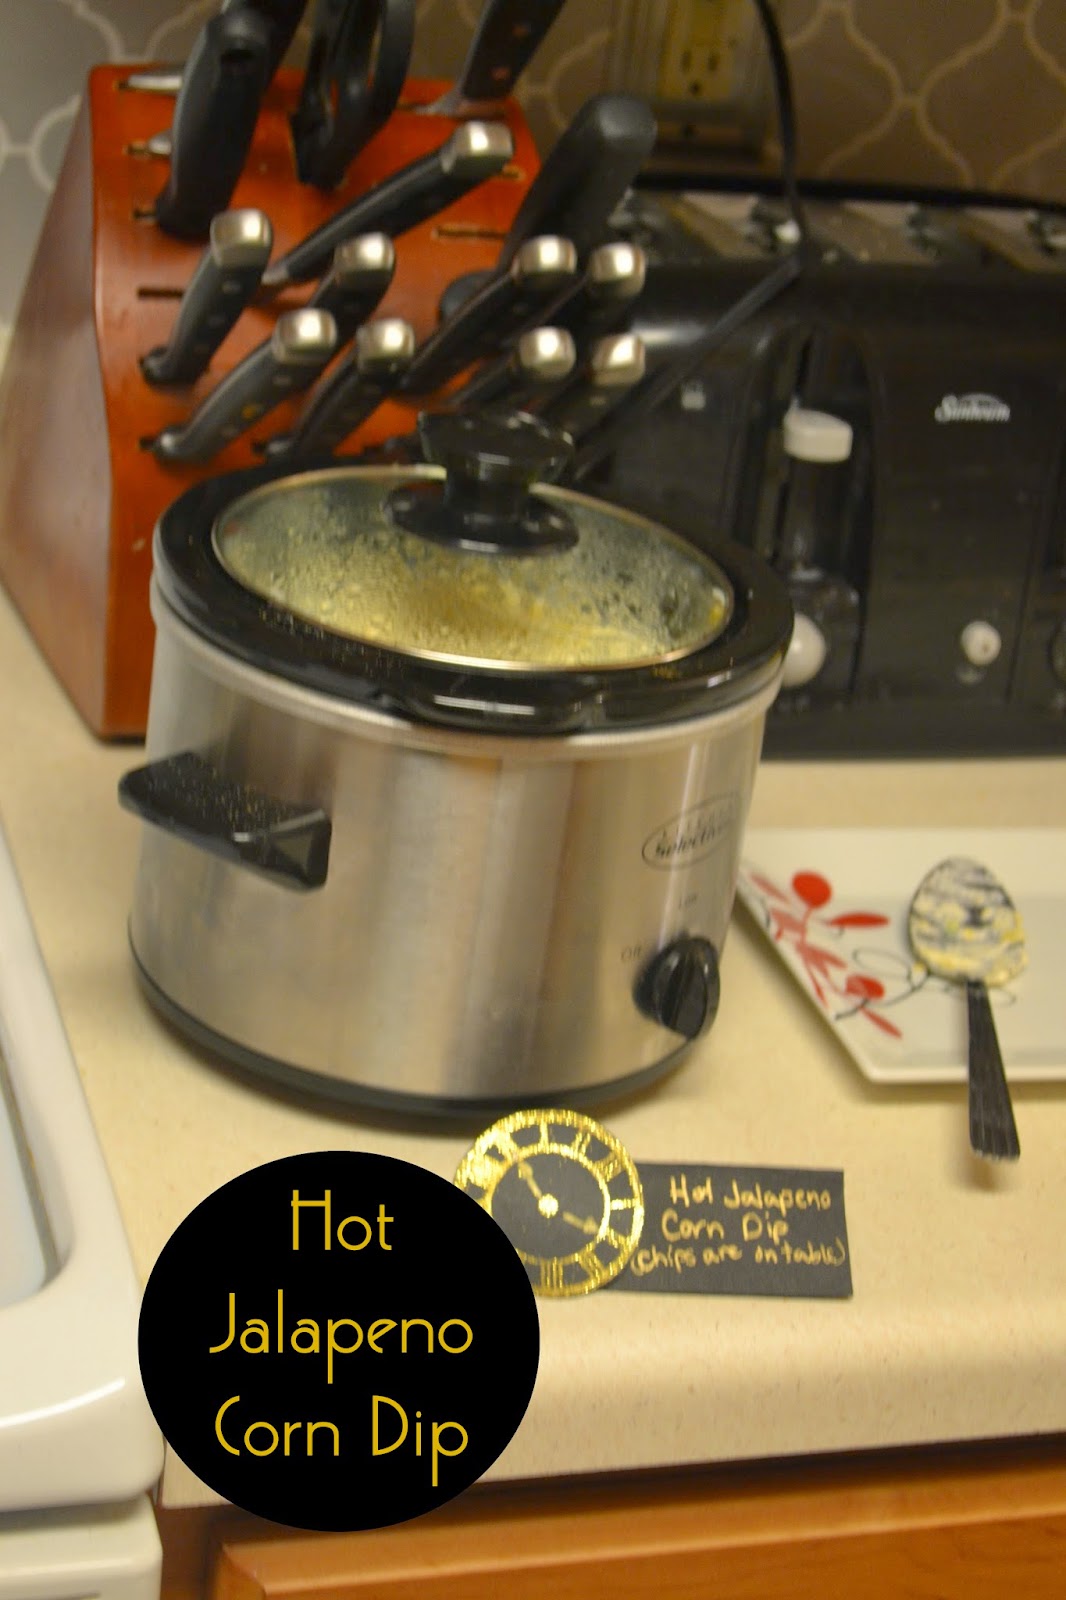
The last few years I have served a queso dip but this year I decided to change it up with a delicious hot jalapeno corn dip.  I used this recipe from Lovely Little Kitchen.  The recipe calls for you to bake the dip in the oven but I doubled the recipe and just stuck the ingredients in my small crockpot.  It worked just fine and was very tasty.
I once again served meatball sliders at the party.  Last year I made the meatballs and slider buns from scratch but this year I decided to make it a little easier.  I bought some pre-made frozen meatballs at Target and a couple of jars of marinara and threw it all in the crockpot about 5 hours before the party. For the slider buns I just bought some rolls at Great Harvest Bread Company.  I love their potato dill bread and the potato dill rolls made delicious slider buns.
I had a hot chocolate bar again this year but I made it a little fancier this year.  I used this hot chocolate recipe from Graceful Little Honey Bee.  It is so delicious and easy.  I doubled the recipe since I got a brand new large crock pot for Christmas.  It is really had to get the cocoa powder to mix in instead of just sitting on the top so I discovered this year that using an immersion blender really helps to mix it up.  The printable was a freebie that I found here from Upcycled Treasures.  I just stuck it in a frame that I had lying around.  For mix-ins I had raspberry and caramel syrup, amaretto liqueur and salted caramel vodka, chocolate chips, marshmallows, cinnamon, candy canes, pirouette cookies, and fresh whipped cream.  The hot chocolate bar was a big hit at the party.
The caprese kabobs and deviled eggs were two simple appetizers to put together.  For the kabobs I just cut up fresh mozzarella and skewered it onto toothpicks with a cherry tomato and a leaf of fresh basil.  I then drizzled olive oil and balsamic vinegar over the kabobs.  I never use a recipe for the deviled eggs.  I just mix mayo, mustard, and pickle relish into the yolks until I get the right consistency and taste.  Then I fill the eggs and sprinkle paprika over the top.

For a dessert I served eggnog gingerbread trifle. I used this recipe from Six Sisters' Stuff.  The recipe uses a spice cake mix for the cake layer but I love homemade gingerbread cake so for my cake layer I used this recipe.  I doubled the recipe and baked it in a rectangular cake pan because I wanted leftovers just to eat with whipped cream.
I served fruit and teddy grahams with a gingerbread cheesecake dip.  I used this recipe from Food, Folks and Fun. The only thing that I changed was adding about half the amount of molasses that was called for.  I also made some delicious toasted ravioli served with some jarred marinara sauce.  I used this recipe from the Land O Lakes website.  I actually changed quite a bit of the recipe after reading comments on the recipe.  I used frozen cheese and frozen beef ravioli from Target.  I thawed it the day before the party.  For the bread crumb mixture I used half italian seasoned bread crumbs and half panko bread crumbs for a little more crunch.  For the sour cream mixture I actually only used half the amount of sour cream and used ricotta instead.  To bake them I used my largest cookie sheet with two cooling racks.  This is my favorite method of baking things like chicken strips and coconut shrimp because it helps the air in the oven to circulate all the way around whatever you are baking and it turns out so much more crispy.
Last but not least I served cowboy caviar with scoop tortilla chips.  I always serve this at my NYE party because black-eyed peas are said to bring good luck in the new year.  This year I thought I would share my recipe as there are many variations on the internet.

Cowboy Caviar
  • 2 tbsp red wine vinegar
  • 1.5 to 2 tsp hot pepper sauce
  • 1.5 tsp oil
  • 1/8 tsp pepper
  • 1 firm ripe avocado, cubed
  • 1-15oz can black-eyed peas
  • 1-15 oz can corn
  • 2/3 cup thinly sliced onion
  • 1/3 to 2/3 cup fresh cilantro, chopped
  • 3-4 Roma tomatoes, coarsely chopped
  • salt to taste
In a large bowl, gently mix all ingredients together.  Serve with tortilla chips.

I wait until right before the party to add the avocado since it turns brown quickly.  I usually make a double recipe because this stuff is so popular.  I could seriously just eat this stuff as a meal.  Wait, I've done that before!  

I haven't been working on a whole lot of projects lately but I hope to start on some surprise projects soon.  I can't wait to share those with you once I can!
Related Posts Plugin for WordPress, Blogger...