Tuesday, July 2, 2013

Happy Anniversary

One year ago from Monday we spent our first day in our new house.  A lot has changed since our first days in this house and I thought I would take a moment to reflect on those changes and the changes that are planned for the future.

I will start with the dining room because I am calling this room done for now. Here is a reminder of what we started with.


And here is what it looks like today:

Projects accomplished: Painted walls and wainscoting, added a stencil pattern to the walls using a glossy over flat paint technique, purchased a dining room table on Craigslist, hung curtain rods and sewed curtains, made art for the room out of photos from our Europe trip (post coming soon).

Still to do: sew placemats, refinish table and chairs (or purchase new chairs)
Next up is the kitchen.

Here are some pictures of the changes I've made:


I don't have any true progress pics yet because I am in the midst of tiling the back splash.

Projects completed: painted walls, changed out switch plates, painted side door, made a faux roman shade with water color painted fabric that I made, made recipe art for the faux brick wall, mounted a spice rack on the faux brick wall.

Still to do: Install a tile back splash with lantern shaped tile (in process right now), change out cabinet hardware
Now onto the living room:


And some progress shots:


Projects completed: painted walls and trim, put up a chair rail, made over bookcases, sewed curtains

Still to do: Get a new TV stand, have an electrician install some sort of overhead lighting and an outlet by the piano, add more art to the walls

Onto the porch, my focus project of the summer

And some progress shots:

Projects completed: painted walls and trim and porch floor (after removing the carpet), hung curtain rod, made window seats out of Ikea shelving units, spray painted an outdoor rug.

Still to do: find/make more pillows for the window seating, find a trunk to use as coffee table (actually might already have this but it is at my father-in-laws house in Western ND so it might be awhile before I get it), make voile curtains, paint trim around front door, make/find art for wall by front door.

Next up, the bonus room.

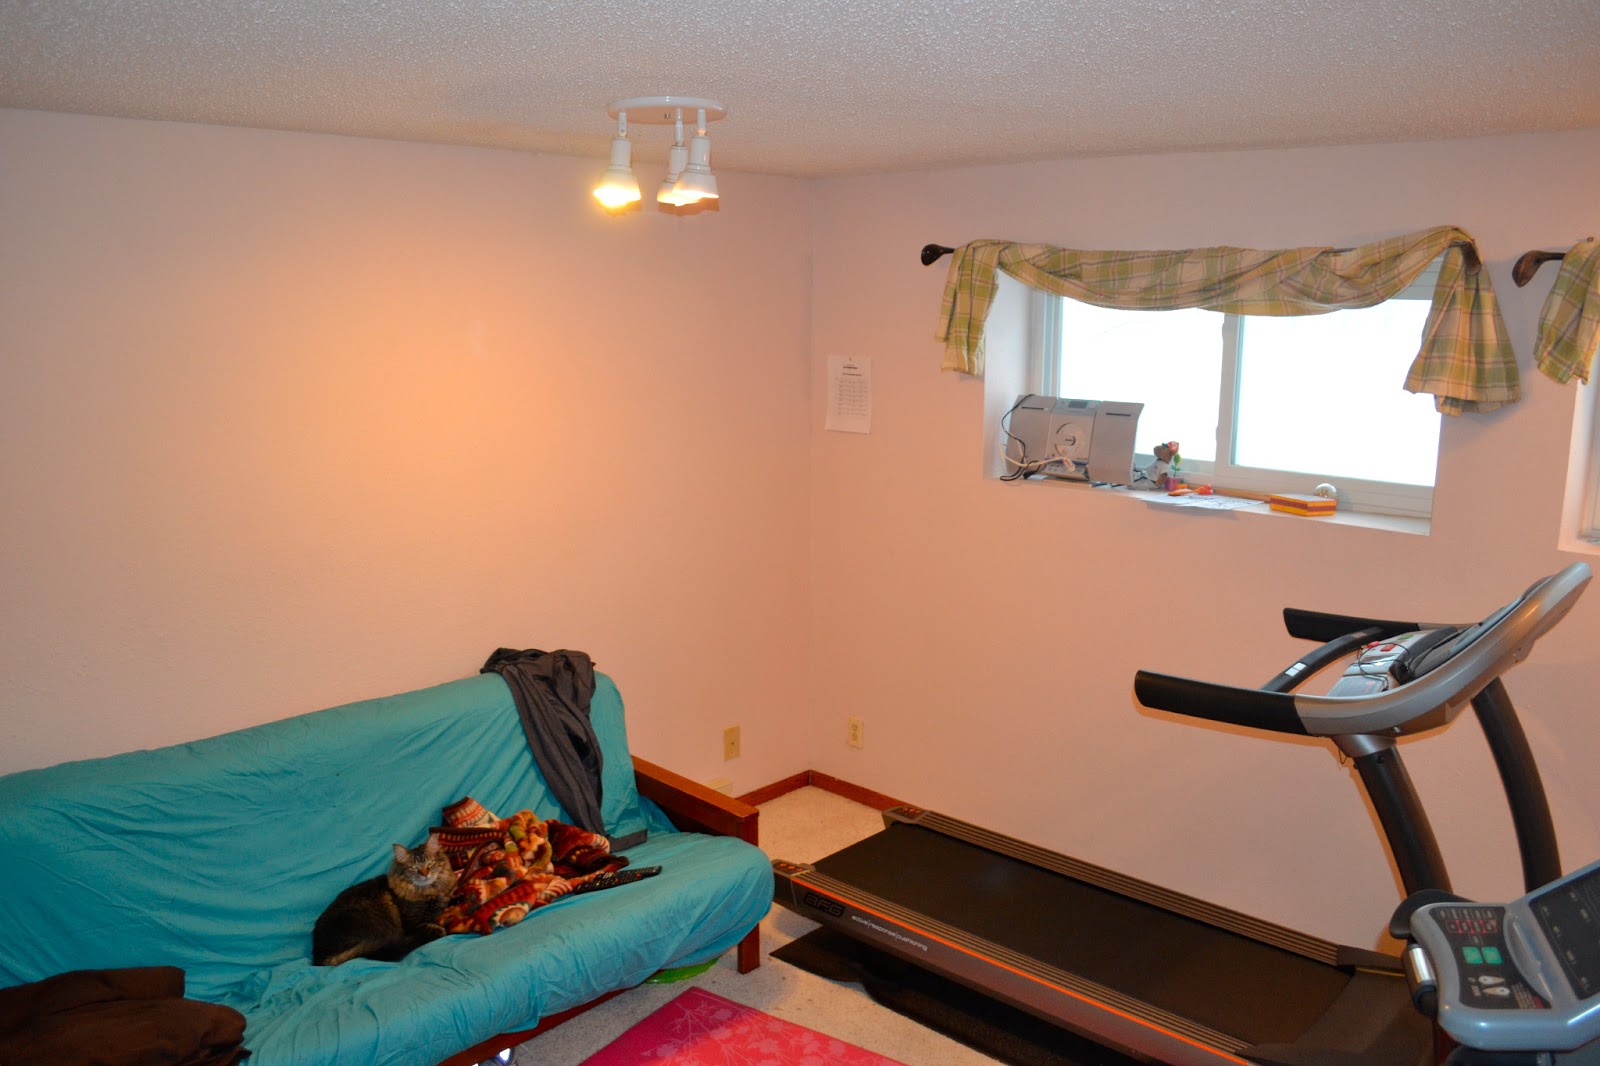
This room was a pretty blank slate:

Projects completed: Add exercise equipment to room, mount a TV on the wall, mount medal display holders.

Still to do: make inspirational word art for walls, new window treatments

I will not be updating the office, master bedroom, or bathrooms in this post.  The master bathroom is pretty perfect the way it is.  Eventually I will add pics to the house tour of what it looks like with all the accessories in it.  The other three rooms have not changed much although I have huge plans for the master bedroom sometime this Fall or late Summer

Next up is the guest bedroom


And now


Projects completed: Painted walls, doors and trim and changed out outlet covers and switch plates

Okay so not much has happened in here but I have big plans for this room as well.  Most of them I can't share yet but my next big project after the tiling in the kitchen is done is to pull up the carpet and refinish the wood floors underneath.  I would also like to do that in the upstairs hallway and on the stairs.

Now for the outside:


Projects completed: Created a bird cage planter, made a raised vegetable garden with cinder blocks, painted the front door (There will be a post in the near future with pictures, don't worry!)

Still to: Someday a new patio, or pergola, or deck or combination, cut back on the number of hosta plants, plant hydrangeas and tulips

Well a lot of work has been done and there is still so much to do.  But I have definitely been enjoying the journey and I look forward to spending many years in this house.

Tuesday, June 25, 2013

Window Seat Ikea Hack


 Today I have the a tutorial for the biggest part of this porch project.  I have seen this project done by many bloggers so this isn't too original but I'll lay it out for you anyway.  Back in March we took a trip to Minneapolis so that my husband and I could run in the Get Lucky 7K race.  Minneapolis is the closest place with an Ikea so I was on a mission to get two of the Expedit shelving units because I had heard that they would work as a bench if turned on their sides. I decided to go with the brown/black finish because I wanted pops of dark to contrast with the mostly light neutral color scheme that I was envisioning.

Now these are not intended to be used as benches but there are two ways to add strength to them so that they can be used that way: 1) add legs (that option would be too tall for my windows on the porch or 2) add a board over the top which is what I opted for.

Other supplies needed:
1. 2 Ikea Expedit shelving units cost: $120
 
2. MDF board (I used 1/2 inch board) cut to proportions of the sides of the shelves (15" by 72.5")-I got it at Home Depot and had them cut down the board to two pieces of that size for my benches. cost: $30

3. 2 inch foam-this stuff is expensive.  I ordered it from Joann online and used 2 50% off coupons. cost: $80 (without coupons $160 yikes!)

4. An electric knife for cutting the foam-I actually didn't own one of these so I bought one.  Since I plan on using it in the kitchen from now on I won't include this expense in the total cost of the project.

5. Roughly 2.5 yards of fabric assuming the fabric is wide enough to fit the width to upholster both benches. I used an indoor/outdoor fabric so that it could be easily cleaned.  I found this particular Ikat fabric at Fabric Guru.  I had never bought fabric from them before but they have great deals on upholstery, drapery, and outdoor fabric.  They were also fast. $30

6. An upholstery stapler and staples (I already owned one)

7. Screws, a drill, and necessary bits and drivers cost (for screws only): $3

Total cost of project: $263

Now onto the process.  First I assembled the Expedit shelves per product instructions.  This was the easiest part.

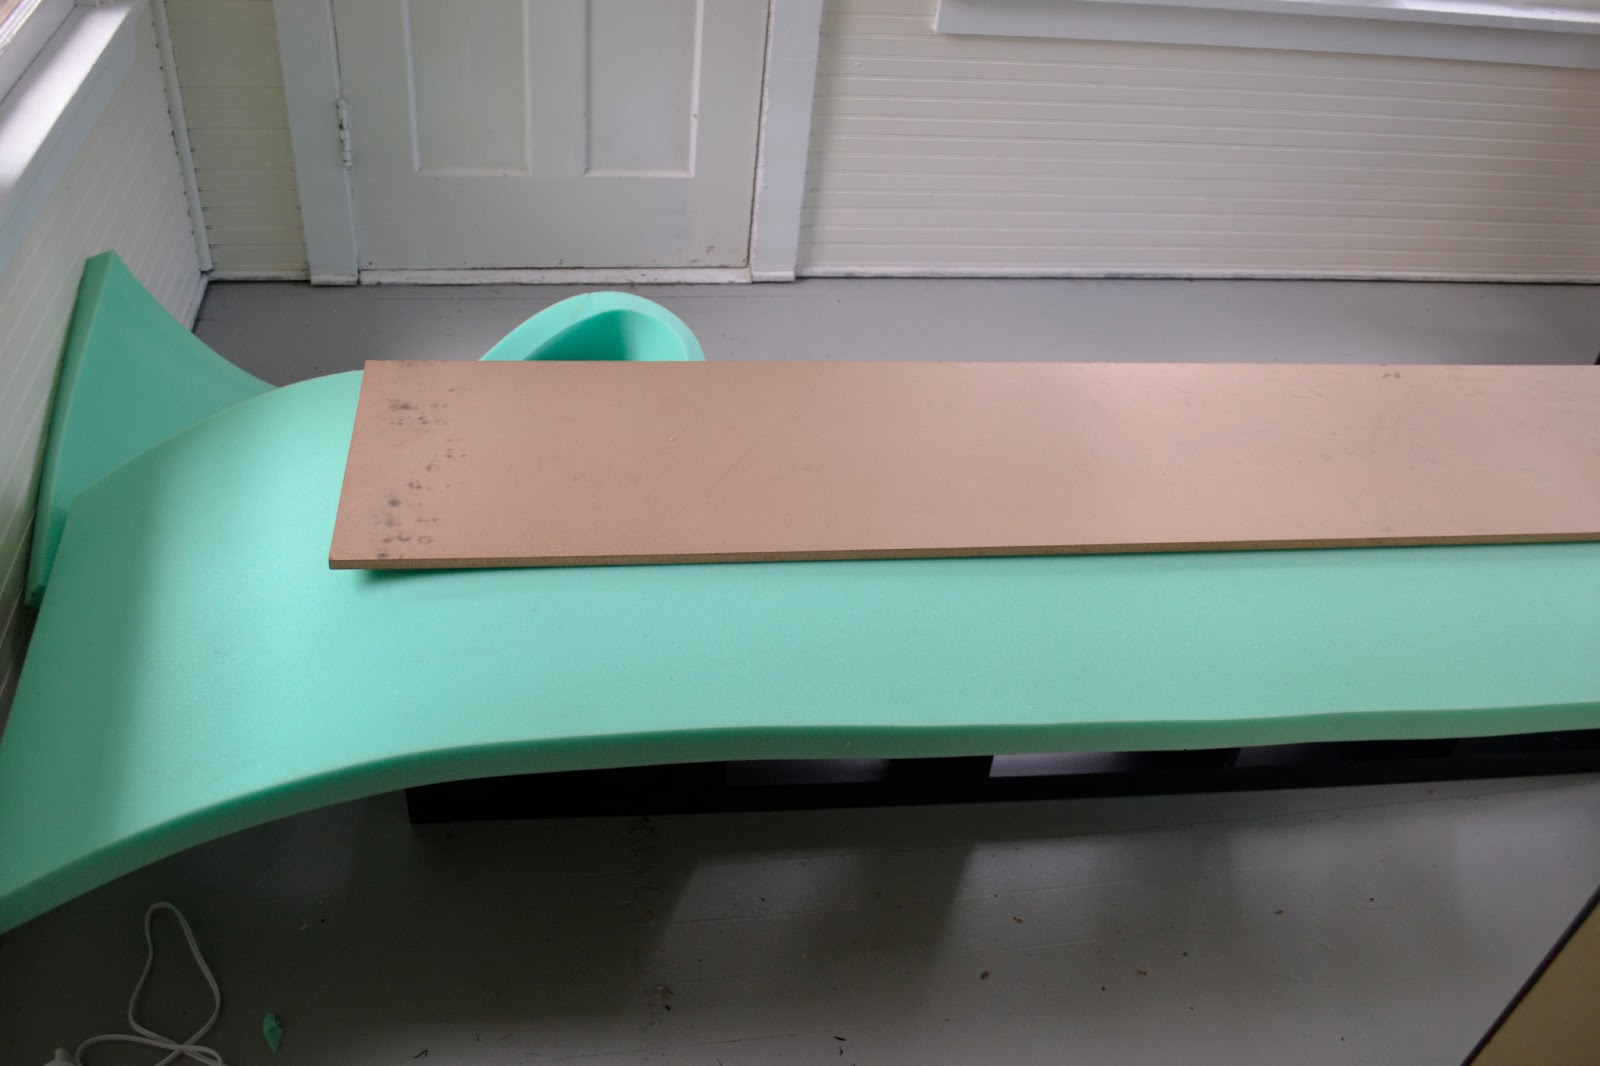
Then I cut the foam with the electric knife using a piece of the MDF as my guide.
  

Then I cut my fabric in half and laid one piece out on my living room floor.  I placed the foam on the fabric followed by the piece of MDF.  I tried to line it up with the pattern of the fabric.


 Then I pulled up the sides and stapled them down making sure to pull nice and tight.  I folded the sides kind of like I was wrapping a present.


Finally, I attached the upholstered pieces to the Expedit units.  This part was frustrating because of the road blocks I kept running into.  First of all, the screws that I bought required a #2 square driver bit which I only realized after I got home.  So I took a trip to Sears to retrieve said driver bit and ended up buying a huge set of various drivers so I don't run into that problem again. Then the package on the screws said you didn't need to pre-drill which was a lie in the case of this project.  Then I had trouble getting the screws to go into the MDF since my drill bit wasn't long enough to go all the way through to the MDF.  Then finally my drill battery died half way through the second bench.  I did finally finish it though.  I used 6 screws per bench, two on each end and two in the middle.  I forgot to take pictures of that part of the process however.


 I have already used these window seats for the purpose of reading and it is great.  I get to enjoy the beauty of the summer while enjoying one of my favorite past times.  I am so in love with how this project turned out!


Wednesday, June 19, 2013

Cinder Block Veggie Garden


So I have been growing tomatoes and various veggie plants from seed for about 4 years now as seen in this post. This is the first year that I am able to plant them in a garden bed instead of containers and I was so excited.  I knew that I wanted to go for a raised bed of some sort because the soil here in the Red River Valley is mostly clay and is very dense.  This makes it hard for roots to spread unless you do a really amazing job of tilling.  

There were several options for raised beds but the option that I chose in the end was the cheapest and the most weather resistant.  I chose to make a raised bed with cinder blocks.  The blocks were only 96 cents but getting them home was an adventure.  We do not own a truck so we loaded them all into the back of my husband's Dodge Avenger.  We looked like we had tricked our car out to be a low-rider and we had to drive very slow.  Thankfully we made it home without destroying the car.

I laid the blocks down 2 deep and eight wide.  The rectangular shape helps with being able to reach all the plants for maintenance and harvest.  Then I went to work getting rid of the grass and I also broke up the soil a little bit.


After that I laid down a layer of newspaper to stifle the grass and weeds that still might have roots in this area.  Then I put the topsoil in and rake it so that it was even.  I figured out how much topsoil I needed by calculating the cubic feet or volume of the bed.
Finally I planted the tomato plants.  My pepper plants went in the containers that I used for both peppers and tomatoes last year.  I also purchased a couple of cucumber plants and planted seeds for squash and green beans.  Squash and green beans are fast growers so they are coming up nicely already.
Another nice thing about the cinder blocks is the extra planting space in each nook of the cinder blocks.  I decided to plant a few of these with basil, rosemary, cilantro, and mint.
I hope to be eating a lot of delicious veggies later this summer!

Thursday, June 13, 2013

Painted Chevron Rug


I am back today with another porch update.  My original plan was to paint a design on the floor itself but I decided that a patterned rug might be a little more fun.  It was definitely not in the budget to buy a rug like this because they are so expensive so I decided to paint a rug.  I bought a really cheap 4'x6' area rug ($17) at Mills Fleet Farm.  If you don't have any Fleet Farms where you live think K-mart combined with Home Depot.  Menards was also having a sale on Rustoleum spray paint (2 for $5) so I picked up a few cans in Aqua and a roll of painter's tape.

I began by taping off vertical lines on the rug about 10" apart.


Then I marked tick marks every five inches on each line of tape to help guide myself in placing the diagonal pieces of tape.


Then I placed pieces of tape diagonally to form the chevron pattern.  These pieces were also about 10" apart.  I made sure to press down firmly on the tape to eliminate gaps.  I also put a double layer or tape because I was worried about the paint bleeding through the tape.

Then I spray-painted the rug.  For some reason I only bought one can of paint and that was not enough to cover the entire rug with one coat.  So I had to take another trip to Menards to pick up another can.  I put two coats of paint on the rug.

After letting it dry for a little bit, I removed the tape.  I was pleased at how crisp the pattern looked.

I had been working on this in the garage because it was sprinkling but then the sun came out so I move the rug to the patio to let it dry in the sun.  Once it had spent 4 or 5 hours drying, I brought it back onto the porch.


Don't mind my winter boots hanging out in that cubby.  They are so ugly but they are great for shoveling snow. This was another simple and inexpensive project, under $30!  It was a great way to add color and a fun pattern to my porch project.


Related Posts Plugin for WordPress, Blogger...