Showing posts with label furniture. Show all posts

Friday, October 21, 2016

Nursery Book Ledges

Hello Everyone!  I am happy to announce that now that Lyla is almost 15 months old her room is finally done!  Over a year ago I shared the big nursery reveal with you but there has been one more thing that I still wanted in the room that we ran out of time to do before Lyla was born.  I had plans for book ledges on the wall next to her closet on the north side of her room.  
I loved seeing that banner from the baby shower on that wall over the past year but otherwise that wall seemed empty.  Now that wall has functional storage for all of her books! My husband did all of the work on this one so I can't take any of the credit.  Don't they look amazing!  He used Ana White's plans for ten dollar picture ledges.  They work great for storing books as well as displaying picture frames.  


Depending on the thickness of the book you can fit the books 3-4 deep on the ledges so it can store a lot of books.  We made sure that the bottom shelf was low enough for Lyla to be able to take books off herself.  All of the books with paper pages went on the top shelf so that Lyla couldn't get them herself and rip the pages.  It is so nice for reading her a story at nap and bedtime because I just grab a book while sitting in the rocking chair.  Lyla also likes it when I let her pick out the book to read.  

Thanks for reading this post!  I have many posts to come in the near future including bow tie pacifier clips, a Harry Potter onesie, updates on the bonus room, and Lyla's kitty Halloween costume.  See you next time!

Thursday, July 7, 2016

4 Years

The fourth year in our house has been the fastest one yet.  The biggest change in our lives this year was our family addition last July with the birth of our daughter.  Technically her room was mostly finished before our 3 year house anniversary but I only shared one photo last year so I thought I would share some more this year.


Above is a reminder of the blank slate that I started with.  The only updates that I did to this room before turning it into a nursery were to paint the walls and trim.  The only furniture in the room was a full bed and the rocker that I bought at a thrift store several years before getting pregnant.


As you can see the room looks completely different.  I loved the way it came together (although it is a little messier in there right now).  I hope to share one more big project in that room in the near future.

The other room that is in the process of getting a large makeover is our bonus room.

A few years ago it looked like this but then it got water damage over the last several years.  The carpet was stained and ruined.  Thankfully everything else in the room besides some drywall was unaffected by the water.


So we had drain tile installed and new drywall and flooring put in.  The workers also installed a banister and built a drywall banister to close off the previously open stairs.

Last weekend we took a trip to Minneapolis and made a stop at IKEA.  We purchased a few furniture pieces there for the room and we are in the process of building them right now.

Well those are the major changes in our house this year.  Most of the rooms of our house are done now but you never know what kind of projects I might come up with over this next year.

Tuesday, June 14, 2016

More Updates in the Bonus Room

When I last posted about this room it looked like this:

And here is a reminder of how it looked before:

After the workers were done with their part of the redo it was our turn to start on our work.  First off we selected some baseboards at Home Depot and my husband took on the task of installing them. There are still a few left to install but we are waiting until we get a new door for the closet first.  Then it was time for paint.  I didn't mind the paint color in this room which is also in the hallway upstairs but for some reason it looked pink under the lights in this room.  It was even more noticeable in person than in the above photos.  We had to paint anyway since the bottom 3rd of the walls were removed and then replaced because of the drain tile installation.  The color we selected is Behr Windrush.  It is a lovely greige that looks different in different lights and at different times of day.


We purchased a new futon because the frame of my futon that I purchased in college was shot.  I think it had been taken apart and reassembled too many times with many moves over the years.  We purchased the Emily Futon in gray linen from Target.  I like this futon because it has a nice modern look and it isn't as bulky as my old futon.  It is also so simple to change it from a bed to sofa.  My other futon required two people to switch it back and forth but this one is easy to do all by myself.

I also purchased this 5' by 7' area rug at Target.  I wanted a soft surface for Lyla to play on in the room.  


This room still needs a lot of things:

1. finish installing baseboards, fill nail holes, caulk, and paint
2. install closet door (the current door wouldn't close)
3. paint trim around the closet door
4. curtain rods and curtains
5. media furniture for the TV
6. toy storage
7. pillows and a throw for the futon
8. wall decor

I hope to have the room mostly finished by the end of the summer.  Wish me luck!


Thursday, February 12, 2015

Slipcovered Glider for the Nursery

This post is shared on That DIY Party 

At the end of my last post I told you that I had gotten a start over the weekend on recovering the glider for the nursery.  I had also said that it would probably be a long time before I posted because the project would take me a while because it was complicated.  I am happy to report that it was not nearly as complicated as I thought it would be and I actually finished the project on Tuesday night!
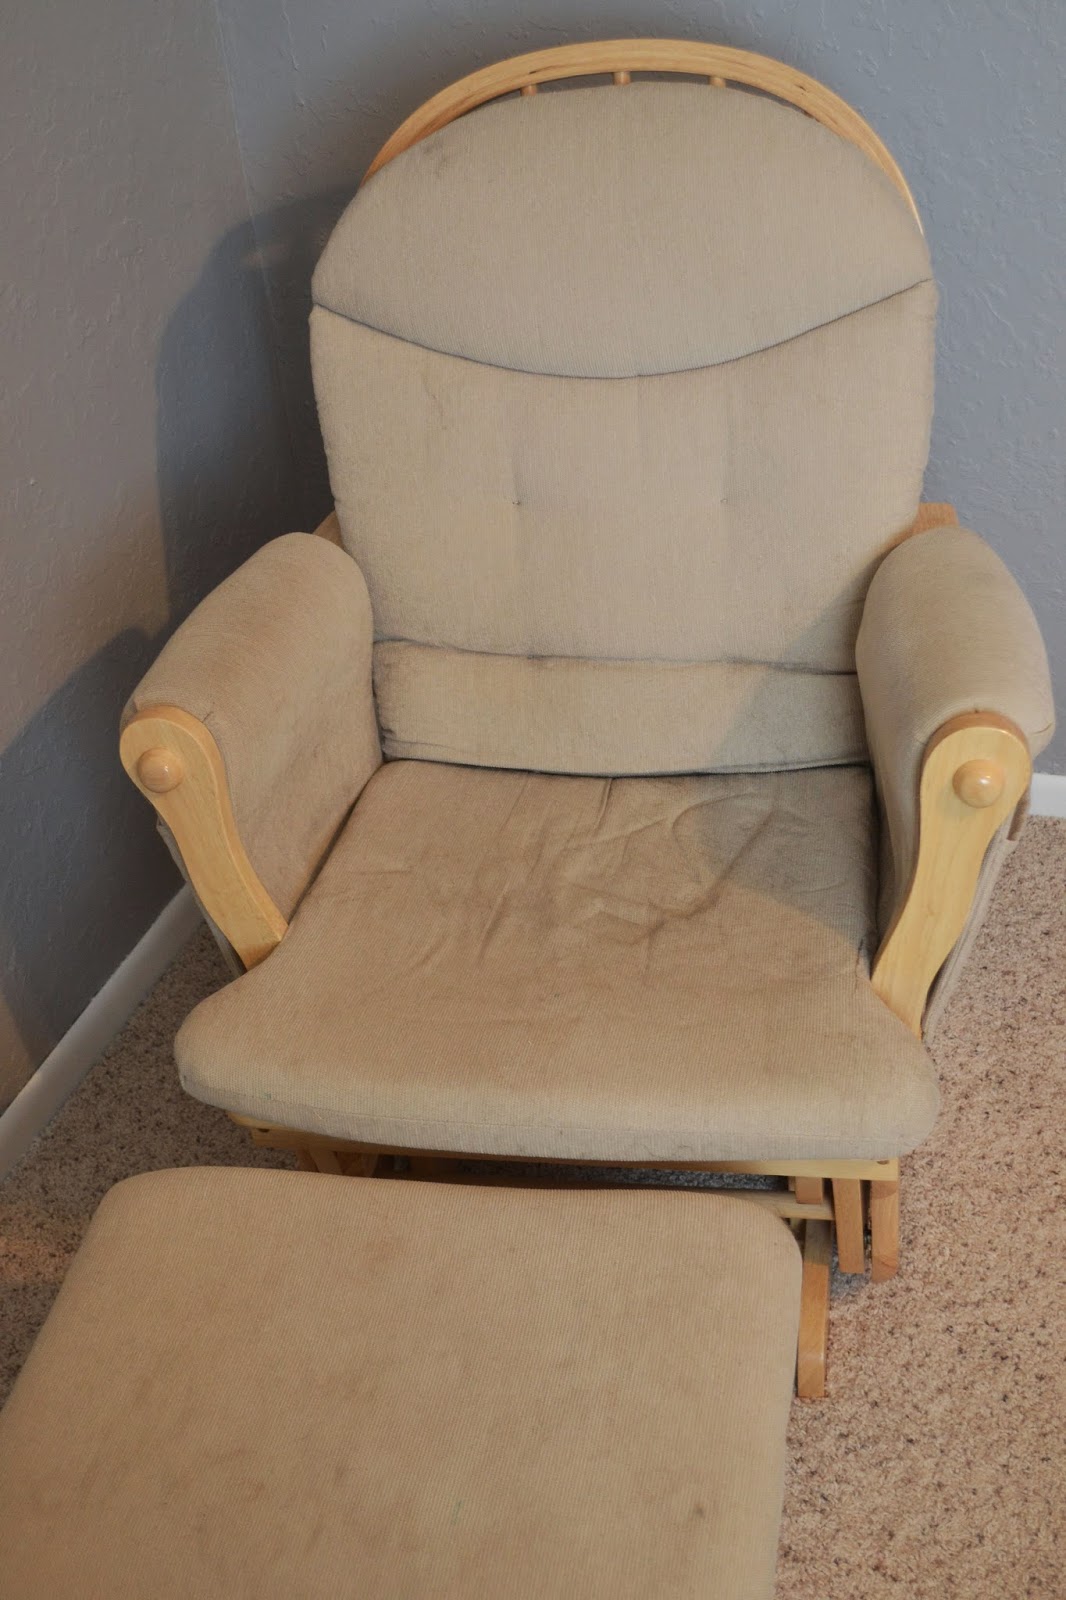
I bought this glider several years ago for $20 at a thrift store.  Other than some ugly and stained cushions it is in perfect condition.  It took a lot of will power to leave it as is for so long so as soon as my 1st trimester fatigue was gone, I was ready to get started on this thing.  I scoured the blogosphere for tutorials on how to recover gliders and finally decided on this excellent tutorial from a blog called Runs With Spatulas.
I am not going to include detailed pictures of the process in this post so you will have to use her tutorial if you want to replicate this project.  I like this tutorial for several reasons.  First of all, it is one of the most detailed sewing tutorials I have ever come across.  Every single step is detailed with pictures and written instructions.
Secondly, every piece is removable so it can be washed.  I was intimidated by all the zipper sewing that goes along with this but because of the detail of the tutorial I was able to successfully and easily install 4 zippers!
I did do a few things differently than the tutorial however.  First of all she made ties to attach her cushions to the back of the chair but I just decided to replicate the velcro straps that were attaching my glider cushions.  I measured the original ones and then used some fabric scraps to make them. Make sure to sew the velcro on opposite sides of the fabric.  I made this mistake once and had to get out my old friend the seam ripper.

Another thing that I did differently than the tutorial was how I covered the ottoman.  She made a cover with elastic that was removable.  I didn't know how well that would stay on while feet were resting on it and rocking so I decided to just staple my fabric on.  I figured that would be the piece that would be the least likely to get dirty anyway.

Well I suppose I should get to the big reveal.  Here is a reminder of what I started with:
And here is the glider now:

Here is a cost breakdown for this project:
Glider-$20
4 yards of fabric-$42
Zippers and Thread-$13
So this entire project ended up costing me only $75! Not too shabby.

If you are wondering what color the fabric is, it is in fact navy.  It reads a little black in the photos in the nursery but it definitely looks navy in person.  Also, I found that adorable fox pillow at Homegoods.  Isn't it cute?  I am not sure what project I will be working on next but hopefully I won't make you wait too long for another post!


Friday, October 17, 2014

Ikea Hack Media Console Part II

Well I said my next post would be about some art for my living room but I haven't gotten around to hanging it on the wall yet because it is a large piece of art and my husband and I have been under the weather.  So instead I am back with Part II of my media console project.  Part I involved creating a top with a herringbone pattern out of paint stir sticks.
The next step in the process was to add a back to the shelving unit.  The shelving unit is open but since it was going to be up against a wall I really wanted a back to hide cords and such.  I purchased 4 pieces of foam core board and taped them together with white duct tape. 

I then cut out holes for the cords of our PS3, Wii, modem, and router.  That large cut out at the bottom is for the cord of the serge protector.  If you look in the above picture you will see a door on one of the compartments.  That was how I decided to hide the serge protector but I wanted the back open so that it would be easy to plug everything in.

Next, I attached some paintable textured wallpaper to one side of the foam core with spray adhesive. The wallpaper is left over from this furniture makeover in our bedroom.

Next I painted the wallpaper with my favorite Martha Stewart Vintage Gold paint which I have used in numerous projects on this blog.  I spaced on taking a picture of this step because I was so eager to attach the back after the paint dried.  I attached the back with white duct tape.  I figured nobody would be seeing the back and this way if I ever decide to repurpose this piece, the back can be removed without ruining the unit.
Here is a look at the detail of the textured wallpaper behind our modem.
Sorry about the messy cords, I still have some sprucing up to do in that regard.  I have spent the last couple of days finding some storage containers for the console and I have a project in mind to make them a little more colorful.  But enough of that because I am sure you are eager to see the finished product.


I wish it weren't so dark on that side of the living room.  I need to get another floor lamp.  Okay, now for a cost break down:
Ikea Expedit Shelving Unit-$100
Ikea Kallax Door Insert-$15
100 Paint Stir Stick-$5
Liquid Nails-$3
Minwax Provincial Stain: $7
Other items used that I already had on hand: paintable textured wall paper, white duct tape, wood conditioner, wipe-on poly, paintbrushes, miter box and saw, Martha Stewart Vintage Gold paint

So the total cost for me was around $130

The storage boxes were a combination of TJ Maxx and Michaels purchases.  Well I think I need to take a nap now.  This cold is really bringing my energy level down.  I'll leave you with one last picture though:)

Related Posts Plugin for WordPress, Blogger...