This past Sunday was my daughter's baptism and we decided to throw a little brunch party at our house for our families and Lyla's godparents afterwards. I wanted a simple celebration but I also wanted it to look pretty. I decided to go with burlap, lace, and vintage elements for my decor. Of course I am generally obsessed with those things anyway but I was inspired by Lyla's baptism gown made by her father's grandmother that her father wore when he was baptized.
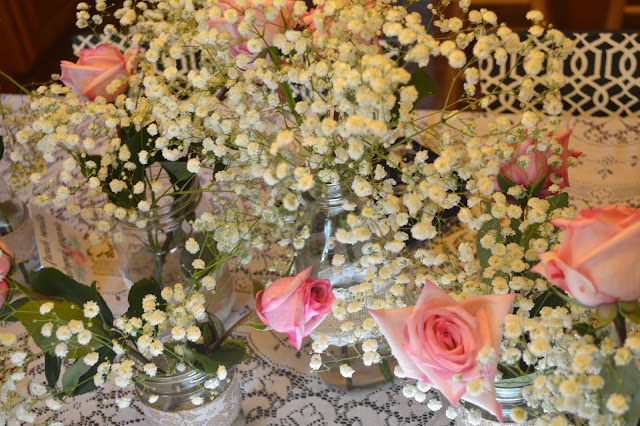
For the decor I borrowed two lace tablecloths from my mom and covered the table and part of our kitchen counter with them. I made a "God Bless Lyla" center piece out of cardstock with my Silhouette Portrait which I will get to later in this post. I found burlap and lace ribbon at Hobby Lobby and Michaels and used it to decorate jars that I had on hand. I put baby's breath and pink roses in the jars. I found a cute thing at Michael's for the plates and napkins and I put the spoons for the yogurt in the creamer portion of a vintage silver tea service. I also used a vintage teacup to hold the chocolate chips in the yogurt bar. The decor was really simple but it looked so pretty.
I decided to go with brunch food because so many things can be made ahead of time. Here is what I served:
Baptism Brunch Menu
- Orange Juice Punch
- Sausage Biscuit Egg Bake-I made two but in the second one I subbed mushrooms for the sausage
- Pioneer Woman's Baked French Toast
- A Yogurt Parfait Bar
- Cherry Almond Vanilla Cupcakes
I bought some plastic cups for the yogurt and three large containers of vanilla yogurt. For the add-ins for the parfaits I had blueberries, strawberries, raspberries, almonds, walnuts, mini chocolate chips and three types of granola which I picked up in the bulk foods section at the grocery store. I made some cute signs for the granola as well as a "yogurt parfait bar" sign with the Silhouette Design software and made it into a print and cut design. If you missed my last post on making print and cut custom wine labels with the Silhouette Portrait then click here to see it.
I arranged the cupcakes into a cross shape. I loved this recipe because the frosting was a lovely pink shade from the 3 tablespoons of maraschino cherry juice in the recipe.
Also the cupcakes were so delicious. It is some of the best frosting that I have ever had and I am not a big frosting person.
Alright, now on to the tutorial portion of this post. The weld option in the Silhouette software is a very useful tool especially when cutting script text. I wanted to make a centerpiece for the table that said "God Bless Lyla" using glitter card stock and I wanted it to be all one piece.
I started by finding a font I wanted. I used the font Lavanderia which was a free font that I downloaded. After typing my text (I made sure the words were 3 separate objects) I selected the word.
I needed the capital letters to touch the lowercase letters otherwise they wouldn't be welded together. In order to do this I had to ungroup the letters.
Once I ungrouped them I was able to move the capital "G" so that it was just slightly overlapping the "o."
After selecting all 3 letters in the word, I went to the object menu, then modify and clicked weld from the modify window.
Now you can see that the letters are all connected.
I did the same thing with the other two words. Once they were welded, I put the 3 words together so that they were overlapping in at least one place and then welded the words together.
I now had one connected piece.
Next I rotated the words 90 degrees and enlarged them to fill almost the entire area.
I cut the design out on glitter card stock. I find it easier to cut out designs on the glitter card stock when I have the non-glittered side facing up on the Silhouette mat. Because of this I had to mirror the design vertically.
Now the design was ready to cut.
To finish of the centerpiece I glued two wooden skewers to the back of the card stock. Then I put some floral foam surrounded by moss into two jars and stuck the wooden skewers into the floral foam. I glued pieces of the burlap and lace ribbon around the jars.
It was such a fun little celebration of a big moment in our daughter's life. I loved how everything fit so well with the vision that I had in my head for the day. I still have more posts for you during this lovely month of October including my daughter's adorable diy Halloween costume so please visit my blog again to check it out.


wow you are so clever in doing these lovely things, I shall be back to get more inspiration** I am so pleased for you that everything worked out so well for your darling's baptism.. gorgeous home too**
ReplyDeleteThank you! I am glad you liked the post!
Delete