Friday, February 6, 2015

A Small Living Room Update

I am back today with a tiny update to our living room that involves the curtains.  I believe that the living room curtains were actually my first sewing project for the house.
I liked the way they looked a lot but after making the grommet curtains for the bedroom I decided that I wanted grommets in the living room curtains as well.
So here is a look at the living room curtains now:


Just try to ignore the clutter and the sleepy cat in the photos above.  I just wanted to get a quick blog post done so they aren't my best photos.  

You may have noticed a few less blog posts than normal lately.  That is due to the fact that I have been very tired the last few months and haven't completed very many projects.  And the reason for this tiredness is (drumroll please)...


I am beyond excited about this!  And now that I am a few weeks into my 2nd trimester and most of my energy has returned I am ready to get started on the nursery.  I have been pinning ideas to a secret Pinterest nursery board for a long time.  Actually, I have to admit that I created the board well before we found out that I was pregnant. 

My first project will be to create slip covers for the chair pads on a glider chair that I found for $20 at a local thrift store.  I found an excellent, detailed tutorial that will hopefully make it easy (it involves zippers which is not my forte so there may be a little frustration involved).  The fabric should be arriving today so I hope to get started on it this weekend.  Here is the fabric that I will be using:

I will also be back this weekend with a post on some Christmas gifts that I gave to my family to announce our pregnancy!


Sunday, January 11, 2015

NYE Party Take 4

This New Year's Eve we hosted our 4th party.  3 of the 4 parties have been hosted at our current house.  You can read about last years party here.  This year I kept the decor pretty much the same and also included a photo booth again which you can read more about in the post from last year.  What I always change up a little bit is the menu.  So this blog post is a look at what I served at the party.
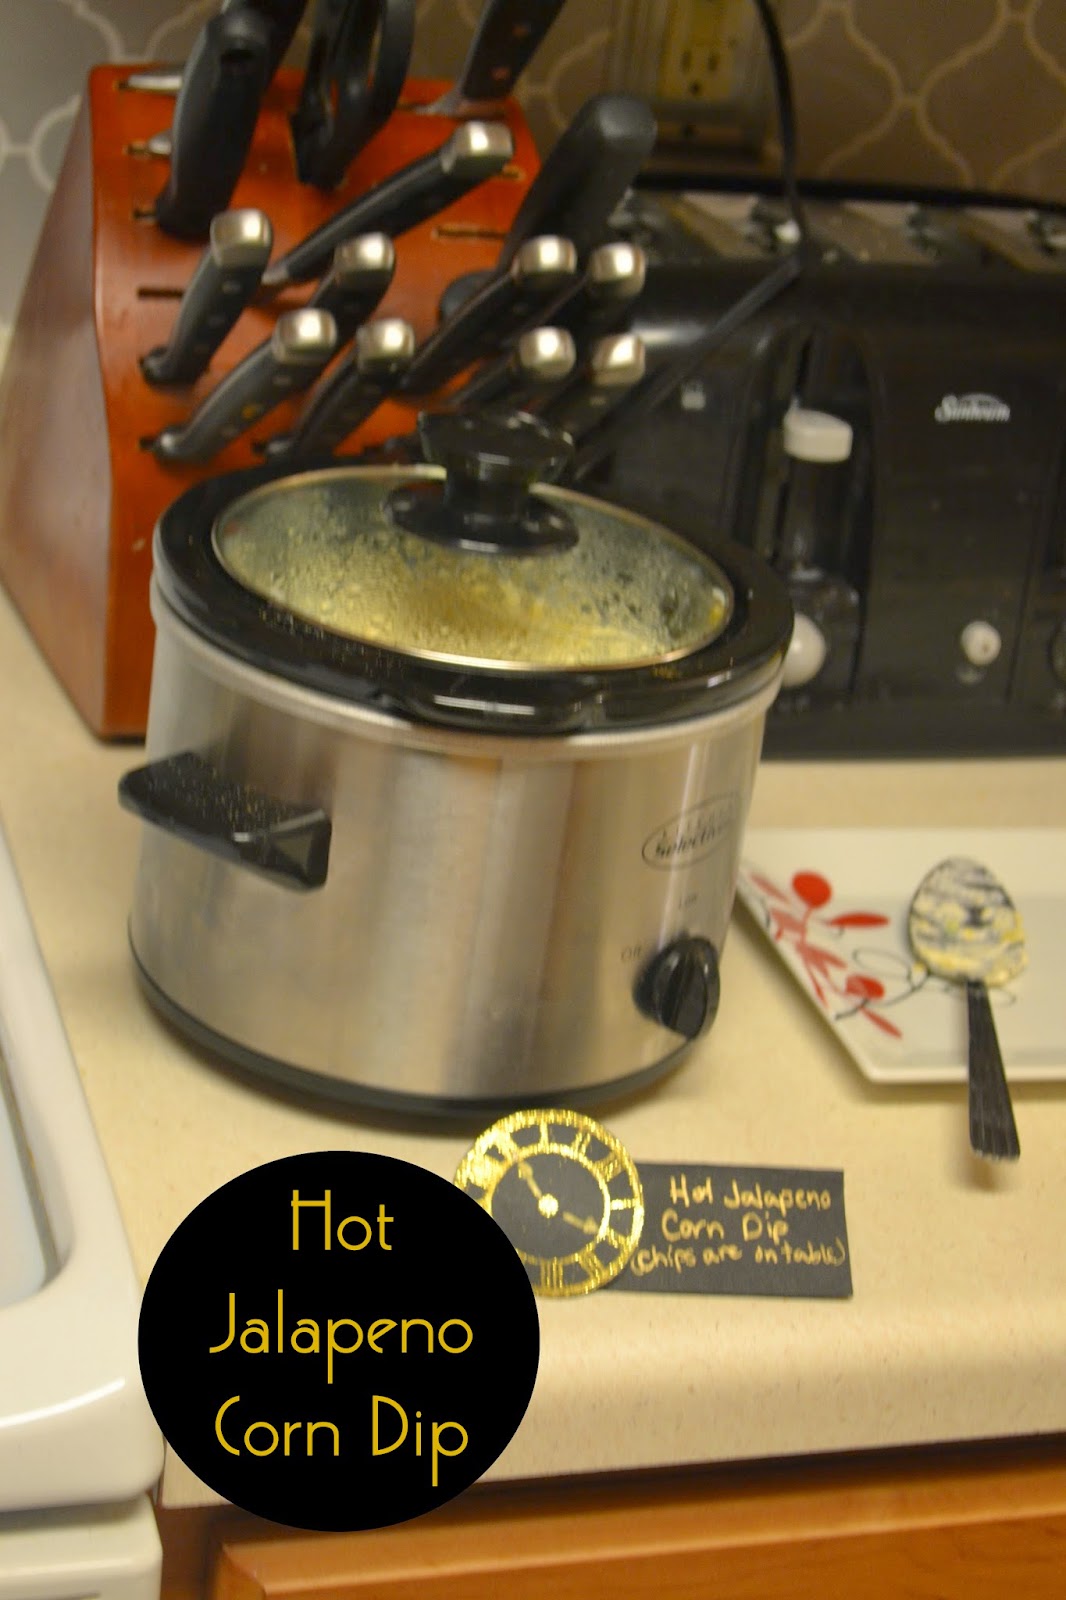
The last few years I have served a queso dip but this year I decided to change it up with a delicious hot jalapeno corn dip.  I used this recipe from Lovely Little Kitchen.  The recipe calls for you to bake the dip in the oven but I doubled the recipe and just stuck the ingredients in my small crockpot.  It worked just fine and was very tasty.
I once again served meatball sliders at the party.  Last year I made the meatballs and slider buns from scratch but this year I decided to make it a little easier.  I bought some pre-made frozen meatballs at Target and a couple of jars of marinara and threw it all in the crockpot about 5 hours before the party. For the slider buns I just bought some rolls at Great Harvest Bread Company.  I love their potato dill bread and the potato dill rolls made delicious slider buns.
I had a hot chocolate bar again this year but I made it a little fancier this year.  I used this hot chocolate recipe from Graceful Little Honey Bee.  It is so delicious and easy.  I doubled the recipe since I got a brand new large crock pot for Christmas.  It is really had to get the cocoa powder to mix in instead of just sitting on the top so I discovered this year that using an immersion blender really helps to mix it up.  The printable was a freebie that I found here from Upcycled Treasures.  I just stuck it in a frame that I had lying around.  For mix-ins I had raspberry and caramel syrup, amaretto liqueur and salted caramel vodka, chocolate chips, marshmallows, cinnamon, candy canes, pirouette cookies, and fresh whipped cream.  The hot chocolate bar was a big hit at the party.
The caprese kabobs and deviled eggs were two simple appetizers to put together.  For the kabobs I just cut up fresh mozzarella and skewered it onto toothpicks with a cherry tomato and a leaf of fresh basil.  I then drizzled olive oil and balsamic vinegar over the kabobs.  I never use a recipe for the deviled eggs.  I just mix mayo, mustard, and pickle relish into the yolks until I get the right consistency and taste.  Then I fill the eggs and sprinkle paprika over the top.

For a dessert I served eggnog gingerbread trifle. I used this recipe from Six Sisters' Stuff.  The recipe uses a spice cake mix for the cake layer but I love homemade gingerbread cake so for my cake layer I used this recipe.  I doubled the recipe and baked it in a rectangular cake pan because I wanted leftovers just to eat with whipped cream.
I served fruit and teddy grahams with a gingerbread cheesecake dip.  I used this recipe from Food, Folks and Fun. The only thing that I changed was adding about half the amount of molasses that was called for.  I also made some delicious toasted ravioli served with some jarred marinara sauce.  I used this recipe from the Land O Lakes website.  I actually changed quite a bit of the recipe after reading comments on the recipe.  I used frozen cheese and frozen beef ravioli from Target.  I thawed it the day before the party.  For the bread crumb mixture I used half italian seasoned bread crumbs and half panko bread crumbs for a little more crunch.  For the sour cream mixture I actually only used half the amount of sour cream and used ricotta instead.  To bake them I used my largest cookie sheet with two cooling racks.  This is my favorite method of baking things like chicken strips and coconut shrimp because it helps the air in the oven to circulate all the way around whatever you are baking and it turns out so much more crispy.
Last but not least I served cowboy caviar with scoop tortilla chips.  I always serve this at my NYE party because black-eyed peas are said to bring good luck in the new year.  This year I thought I would share my recipe as there are many variations on the internet.

Cowboy Caviar
  • 2 tbsp red wine vinegar
  • 1.5 to 2 tsp hot pepper sauce
  • 1.5 tsp oil
  • 1/8 tsp pepper
  • 1 firm ripe avocado, cubed
  • 1-15oz can black-eyed peas
  • 1-15 oz can corn
  • 2/3 cup thinly sliced onion
  • 1/3 to 2/3 cup fresh cilantro, chopped
  • 3-4 Roma tomatoes, coarsely chopped
  • salt to taste
In a large bowl, gently mix all ingredients together.  Serve with tortilla chips.

I wait until right before the party to add the avocado since it turns brown quickly.  I usually make a double recipe because this stuff is so popular.  I could seriously just eat this stuff as a meal.  Wait, I've done that before!  

I haven't been working on a whole lot of projects lately but I hope to start on some surprise projects soon.  I can't wait to share those with you once I can!

Wednesday, December 24, 2014

Design Your Own Christmas Card and Silhouette Address Labels


I love using Shutterfly to make our annual Christmas card.  For the last few years we have taken our Christmas card picture in front of our house with the camera set up on a tripod.  This year I went through every page of Christmas cards on Shutterfly and couldn't find one that was exactly what I wanted and then I saw that you could upload your own.  That was really appealing to me so I opened up Pixelmator (my photo editing software) and got to work.
I started by opening up a canvas with the size of Christmas card that I wanted.  I then opened our photo in a different window and resized the image and copied and pasted it onto my Christmas card canvas.

I knew that I wanted a chalkboard look so I googled chalkboard background, found one that I liked, and dragged it to my computer desktop.  I then opened the image on my Christmas card canvas and adjusted the image size until I got the right look next to our photo.  I used a mix of fonts that I have on my computer.  The floral images were a purchased item which you can find here.  Once I got everything to look like I wanted it on the card, I saved the image as a JPEG and uploaded it to Shutterfly.  It was that easy folks, I'm not kidding!  I am excited to design more cards of my own in the future!

Once the cards arrived my next task was to create some address labels using my Silhouette.

As you can see, I put registration marks on the page so that I could use the Silhouette's print and cut feature.  Originally I planned on just buying some white sticker paper for these labels but Michaels was out so I decided to buy the printable silver foil instead.  I was skeptical of how it would work in the printer but it worked fabulously.  I set my printer to glossy photo paper just because I thought it would help it to print properly.

Once the labels printed I put the sheet on my Silhouette cutting mat and loaded it into the machine. Before sending the design to cut I made sure to select all the labels and set them to cut outside edge in the cut settings window. This is an important step, otherwise all of the designs and letters will be cut out too.  Once you send the design to the Silhouette it will start by reading the registration marks and then it will cut all the labels perfectly.  It is so easy!

I love how the labels turned out!  It was exciting to send out Christmas cards that were so personalized this year!  Have a Merry Christmas and a Happy New Year everyone!

Thursday, December 18, 2014

Twinkle Christmas Art

Christmas is one of my favorite seasons but as a music teacher it is also one of my busiest seasons.  I spent the month of November prepping my students for Christmas concerts that have been happening over the past two weeks.  I spend a lot of time outside of the school day working on Christmas program related things which doesn't leave much time for projects at home.  I have, however, found time to decorate the house for Christmas and my decorations include one new addition in the form of an art project which I am excited to share with you today.
O Holy Night is one of my favorite Christmas carols so I thought a piece of art featuring the carol would be a perfect addition to my Nativity scene.  For this project I used an art canvas, a print of O Holy Night sheet music on card stock (click here to print your own), Mod Podge, Silhouette brand adhesive vinyl, a foam brush, a battery powered string of lights, and dark blue craft paint.
I used the Mod Podge to attached the card stock music sheet to the canvas.  I applied the glue to the canvas and the back of the card stock.  After it dried I applied a layer of the glue over the top of the card stock.  There were a few bubbles but they aren't noticeable in the finished art so I didn't mind.
Next, I created the word file in my Silhouette software.  I chose to make some of the words script and others more bold.  I then cut the words out on adhesive vinyl.
I then put the letters on the vinyl using transfer paper.  I applied a very light coat of Mod Podge over the letters to prevent bleeding of the craft paint. I then painted the entire canvas with the blue paint. It took a couple of coats.  Once it dried a little bit I started to remove the letters.  If I did this project again I would have waited for the paint to dry completely because some of the paint lifted up as I was removing the letter.
I used a box cutter to carefully remove the vinyl setters.
I realized later that I forgot to remove the vinyl letters for the word "it."  That is how I discovered that it worked a little better when you let the paint dry completely.
I used one of my small drill bits to put holes in the canvas and then poked the lights through.  I didn't end up putting all of the lights on the strand through the canvas.
I propped the canvas against the back of the built-in in our dining room next to the Nativity scene and then put the battery box for the lights behind the creche.  I interspersed the extra lights into the greenery in front of the canvas.
It was hard to get a clear picture for some reason so sorry for the bad pictures.  It looks so much cooler in person, trust me.  I will be back soon with a post on designing your own Christmas cards in Pixelmator and making address labels with the Silhouette cutting machines.  

Saturday, November 22, 2014

Stenciled Storage Boxes

For some reason I have been procrastinating on this super simple project that I have to share with you today.  I don't know why because now that I have completed it I love it so much.  Last month I completed a Ikea hack media console which I detailed in these posts: Part I and Part II
I wanted to add some color and detail to the storage boxes that I purchased at Michaels.  I love them because they are covered in burlap and a nice off white textured fabric.  I got them when they were 50% off so they were only $3 per box.  My favorite way to add interest and detail to something is by using a stencil so I chose some shapes from my Silhouette library that I could turn into stencils.  I made the stencils out of projector transparency sheets which I detail in this blog post.

I used the following shapes from the Silhouette Design Store to make my stencils: chevron stripes, chinese lattice, scallop pattern, and violets lace.

Next I gathered up some paint samples and craft paint that I had on hand and a stencil brush.

It was such a simple and quick project.  I decided to only paint the visible end of each box.


It was such a simple and pretty project.  I love how my living room has been transformed over the last few months with the purchase of our new couch and TV, the media console project, the Tulsa skyline watercolor painting, and now these pretty storage boxes.

Friday, November 7, 2014

Watercolor Skyline

Today I am back to share a new addition to our living room.  Awhile ago I pinned this inspiration pic to my living room board on Pinterest:
It is a painting of the skyline of the city I was born in: Tulsa, OK.  I was ready to purchase this painting from the Etsy seller but by the time I got around to it the Etsy seller no longer existed.  I was bummed but then I decided to take matters into my own hands and make my own.

I started by buying a large piece of watercolor paper from a local art store.  Because the piece was $10 I decided that I would do a test painting on a standard letter size of watercolor paper to practice before I painted the real thing.  I wanted to make sure that the technique would work and I also wanted to experiment with colors to make sure I got the right combination.
So here is how I did it.  I started by drawing the skyline and then scanned it in so I could trace it in my Silhouette software.
To make the lines nice and straight I edited the points until I got it to look exactly like I wanted it.  It took some time but it was worth it to get a crisp finished product.
I then enlarged the image and separated into 3 different pieces so that it would be big enough for my large piece of watercolor paper.
I cut the skyline out on contact paper using the settings from this post.

It took a little bit of time to make sure that I got the pieces lined up right on the paper but the contact paper is forgiving since it can be removed and repositioned.
Then it was time for the paint.  I chose bright colors since there is a lot of negative white space in the painting.
Then I removed the contact paper and ended up with these nice crisp lines.
I took the painting to Michaels and had it custom framed.  I chose a white double mat and a white framed because I wanted the skyline to pop and I really like the white on white look.  It is really hard to get a good photo of this with my bad living room lighting.  It looks so much more awesome in person.
It is nice to have something on the wall in the living room finally besides the mirror that we have over the piano.  Check back this weekend or next week for a post on stenciled storage boxes for the media console.


Related Posts Plugin for WordPress, Blogger...