It is hard to believe that we have been living in our house for 3 years now. Each year I like to recap the big projects that have happened in our house over the past year. I'll start with the exterior. Last summer we had a issue with our roof sliding off in sheets of shingles.
It was not a pretty sight. We were hoping to make it a few more years in the house before having the roof replaced but I guess our roof just decided that it was done. So we bit the bullet and got it replaced.
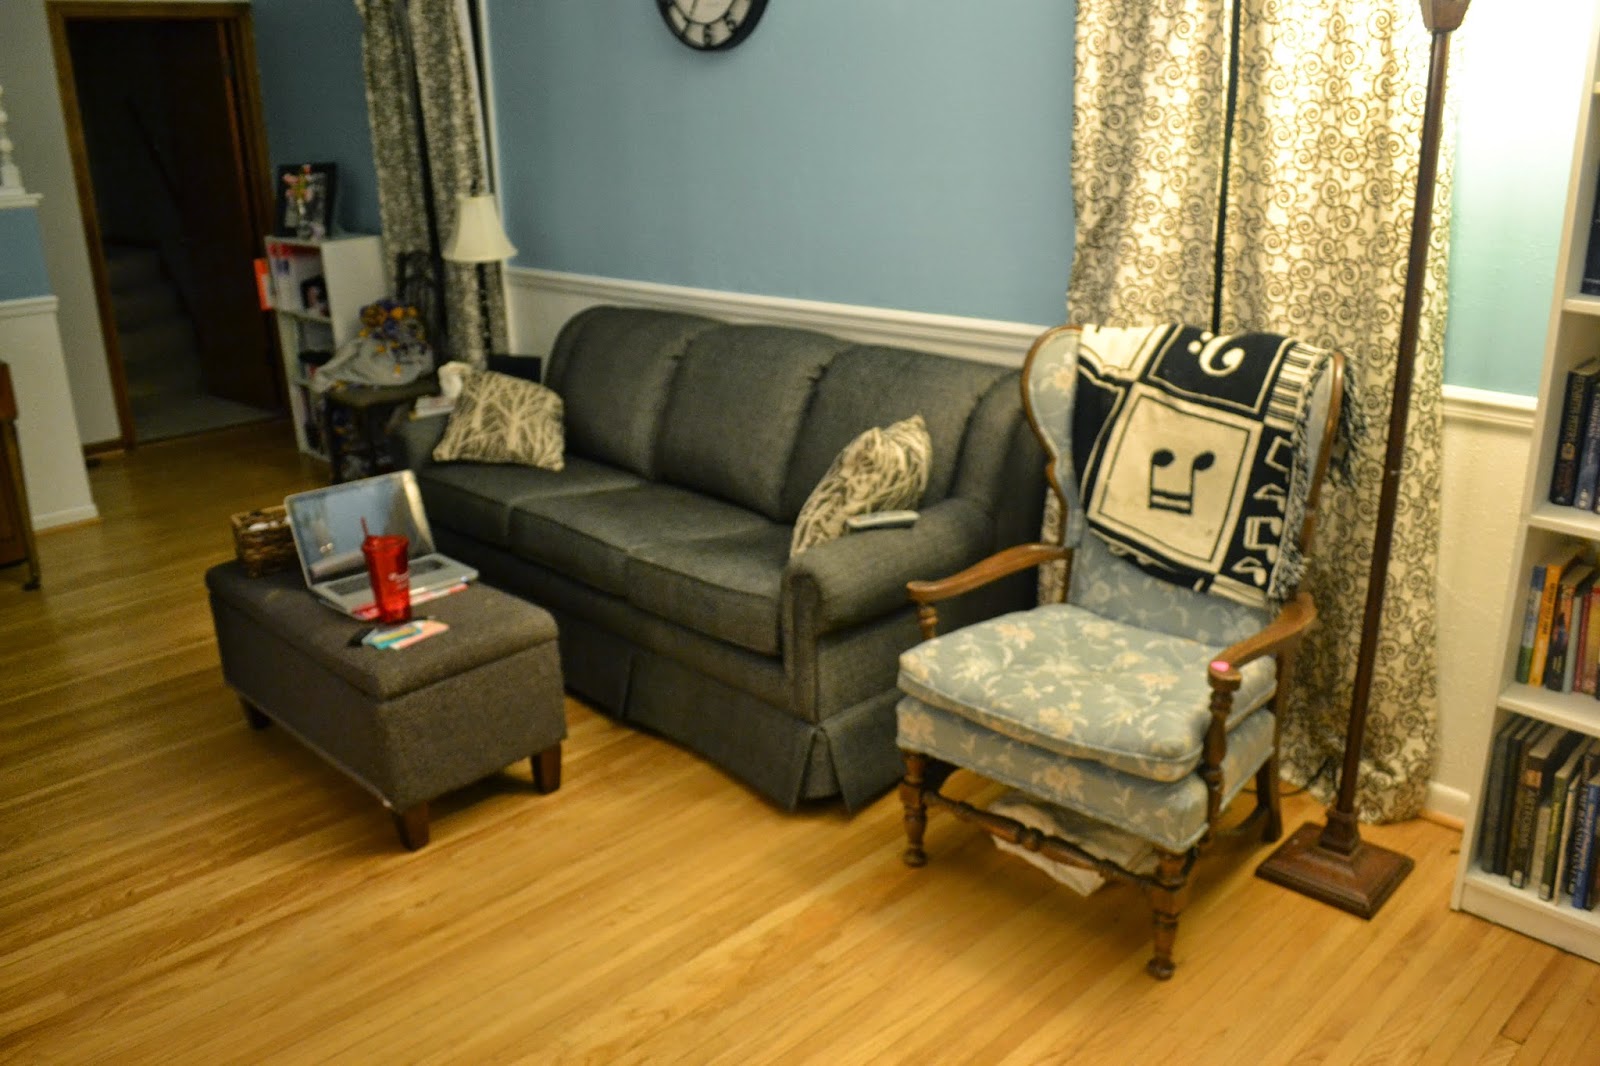
Another part of the house that saw some major changes this year was the living room. We painted the living room and put up a chair rail before we moved in and then I made some curtains in November of that year but other than that the room stayed the same until this past fall/winter. First we bought a new couch that was smaller than our previous one so that it fit the shape of the room better.
Then we purchased an Expedit shelving unit from Ikea that we turned into a media console. You can check out the hack here: part I and part II.
We also purchased a new TV and then I stenciled some storage boxes for the console.
Next I made a skyline painting to go over the couch.
Finally I completed a small update to the living room curtains by adding grommets.
So without further ado, here are some photos of the living room in its current state. I have also updated the house tour photos for the living room since the previous pictures didn't even include the living room curtains!
The next room that has gone through the most drastic change over the past year is our guest bedroom.
The only thing that had been done in this room previously was painting the walls and trim. I had always anticipated that it would become a nursery so I didn't really try to do much else with it in the meantime. I am not going to update the house tour or post a lot of pictures of the room until I do the big reveal but I thought I would give you one sneak peek photo so you could see the drastic change.
Just a little bit of a difference, right? A few other parts of the house have gotten some small changes over the past year. In the spring, I added some drawer inserts to the window seats on the porch.
I also painted the office.
So that is a recap of the year. We are getting to the point in our diy home journey where major room overhauls are mostly a thing of the past but there could be one drastic change to the addition (office and bonus room) over the next year. Stay tuned for that!
Showing posts with label porch. Show all posts
Sunday, July 5, 2015
Saturday, April 18, 2015
A Porch Update + Nursery Art
Today's post is a combination of two small projects. First, I have a little update to the porch window seating. This is what it looked liked before:
Not too shabby right. The only thing that I didn't like was the open cubbies on the Ikea Expedit shelves. Ikea makes door inserts for their Kallax shelving units (formally Expedit). They are $15 a piece so it wasn't the cheapest of updates but I think it was totally worth it.
The lighting wasn't nearly as good as it was in my before photo and don't mind those little gnomes hanging out in the window. That is where they live in the winter! The inserts were very easy to install with the exception of a few cubbies that had screws blocking the way because that was where the mdf was screwed into the Expedit shelf. I just had to cut some pieces out of the backs of the inserts to get them to slide into those cubbies.
I like how much more built-in the benches look with the doors installed. I also like that things stored in the the cubbies can now be hidden which will make the space more functional and less cluttered. I think that the door inserts also add even more stability to the benches. They don't creak at all when I sit on them now (even at 6 months pregnant)
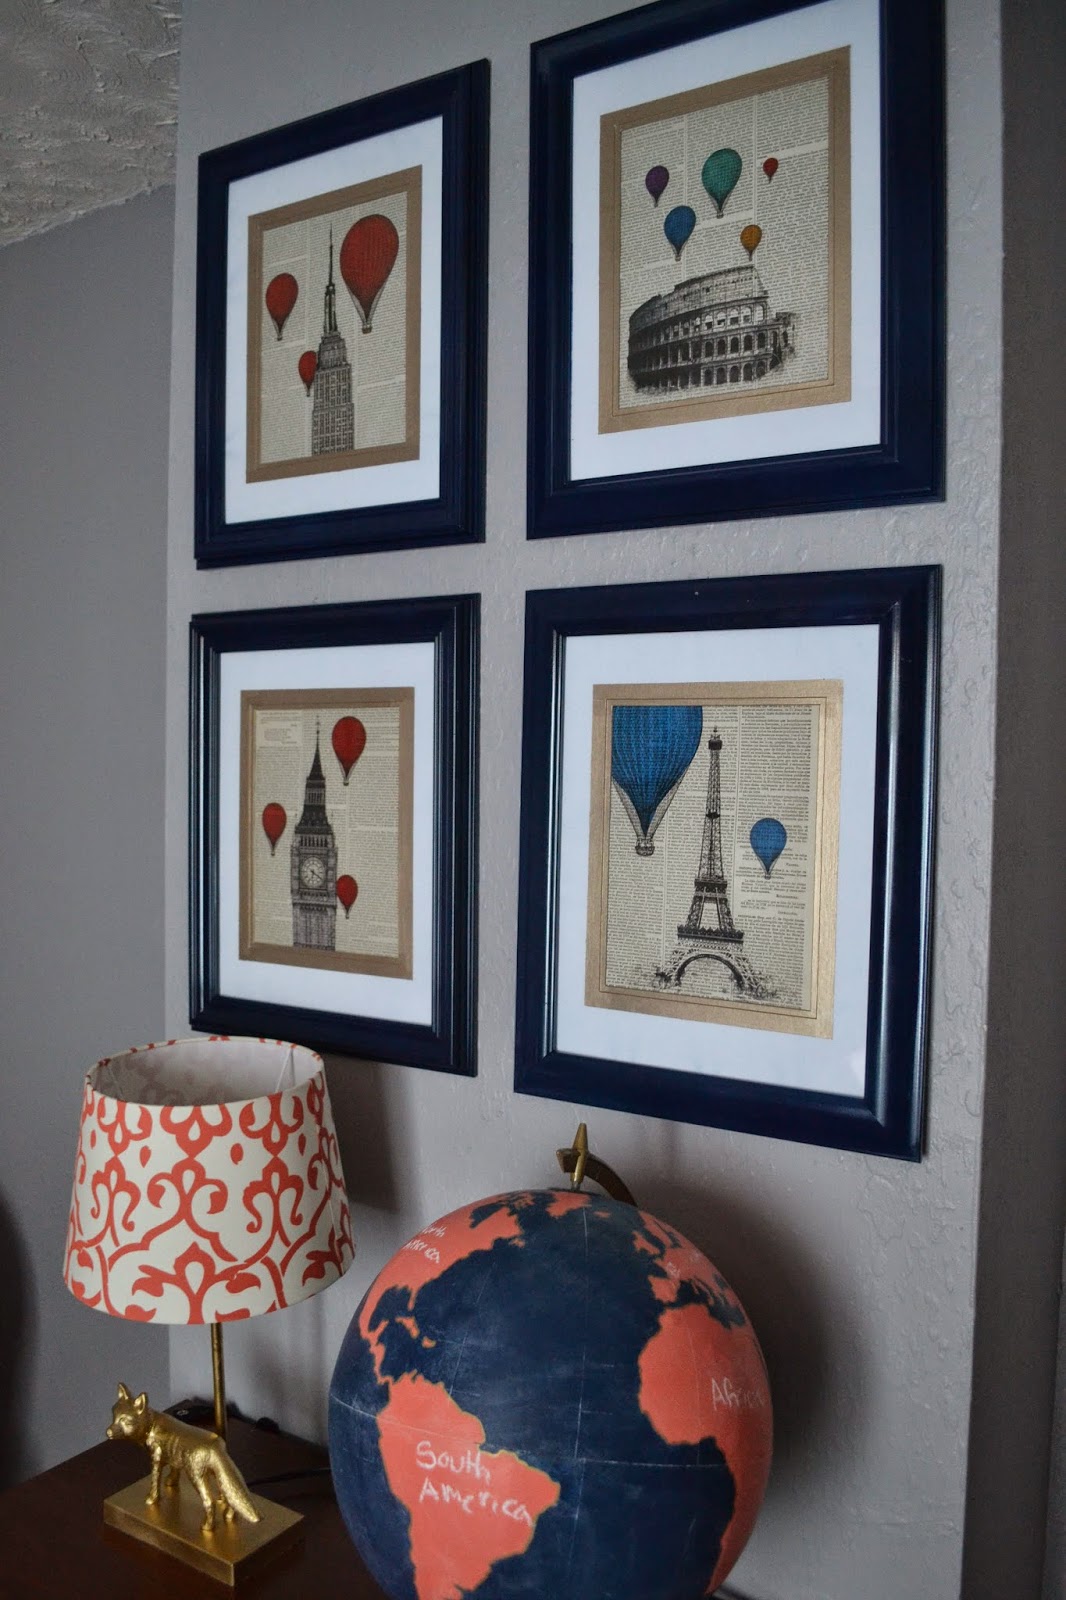
Next up is another nursery project. This was one of those projects where I thought I took more pictures but when I was uploading them from my camera I discovered that that was not the case, sorry! One of the things that I have become obsessed with while designing this nursery is hot air balloons. I think that they are the perfect vintage travel vehicle and are so whimsical (just wait until I write a post on the decoration that I made for above the crib!) A long time ago when I found this print for the porch, I also found some awesome hot air balloon prints.
The prints come from an Etsy shop called PRRINT that prints on vintage dictionary pages. I knew that I didn't want to cut the dictionary pages down to a standard size so I found 4 similar frames with mats at TJ Maxx. I wanted to add a little pizzazz to the frames so I started by painting the inner portion of the mats gold. Here is the one process pic I took for this project where I had taped off the mat with painters tape:
The frames were all black which wasn't quite what I wanted so I decided to spray paint them all navy. Unfortunately the glass was glued into the frames so I spent a lot of prep time covering the glass. Also it is sometimes challenging to find a good day to spray paint in North Dakota because even when it is warm enough outside it is often ridiculously windy. Last Saturday I found a window of about 3 hours where the temp was warm enough and the wind hadn't picked up yet. Today I am hoping to spray paint something else so I am hoping the wind will cooperate today. I used Rust-Oleum Painter's Touch in navy blue. This is the first time that I have used the Painter's Touch paint and I have to say that it is awesome. It took one coat folks and it turned out smooth and glossy. I am not the best spray painter in the world so I appreciated that this looked so nice even with my lack of spray painting skills.
By the way, I picked that adorable fox lamp up at World Market. I spray painted it gold when I was spray painting the curtain rod a few weeks ago. The bookshelf is from Target.
Well that is about it. I hope to be back soon with a fairly detailed post on the decoration that I made to go above the crib in place of a mobile. It is seriously one of my favorite projects so far so I can't wait to share!
Not too shabby right. The only thing that I didn't like was the open cubbies on the Ikea Expedit shelves. Ikea makes door inserts for their Kallax shelving units (formally Expedit). They are $15 a piece so it wasn't the cheapest of updates but I think it was totally worth it.
The lighting wasn't nearly as good as it was in my before photo and don't mind those little gnomes hanging out in the window. That is where they live in the winter! The inserts were very easy to install with the exception of a few cubbies that had screws blocking the way because that was where the mdf was screwed into the Expedit shelf. I just had to cut some pieces out of the backs of the inserts to get them to slide into those cubbies.
I like how much more built-in the benches look with the doors installed. I also like that things stored in the the cubbies can now be hidden which will make the space more functional and less cluttered. I think that the door inserts also add even more stability to the benches. They don't creak at all when I sit on them now (even at 6 months pregnant)
Next up is another nursery project. This was one of those projects where I thought I took more pictures but when I was uploading them from my camera I discovered that that was not the case, sorry! One of the things that I have become obsessed with while designing this nursery is hot air balloons. I think that they are the perfect vintage travel vehicle and are so whimsical (just wait until I write a post on the decoration that I made for above the crib!) A long time ago when I found this print for the porch, I also found some awesome hot air balloon prints.
The prints come from an Etsy shop called PRRINT that prints on vintage dictionary pages. I knew that I didn't want to cut the dictionary pages down to a standard size so I found 4 similar frames with mats at TJ Maxx. I wanted to add a little pizzazz to the frames so I started by painting the inner portion of the mats gold. Here is the one process pic I took for this project where I had taped off the mat with painters tape:
The frames were all black which wasn't quite what I wanted so I decided to spray paint them all navy. Unfortunately the glass was glued into the frames so I spent a lot of prep time covering the glass. Also it is sometimes challenging to find a good day to spray paint in North Dakota because even when it is warm enough outside it is often ridiculously windy. Last Saturday I found a window of about 3 hours where the temp was warm enough and the wind hadn't picked up yet. Today I am hoping to spray paint something else so I am hoping the wind will cooperate today. I used Rust-Oleum Painter's Touch in navy blue. This is the first time that I have used the Painter's Touch paint and I have to say that it is awesome. It took one coat folks and it turned out smooth and glossy. I am not the best spray painter in the world so I appreciated that this looked so nice even with my lack of spray painting skills.
Now in some of these pictures it is hard to discern that the frames are in fact navy but that is just the nature of navy blue.
Here is a picture that shows you what a mess the rest of the nursery actually is right now. Those trim pieces in the corner are quarter round for our bedroom which has been a project on our list for over a year now. Better get on that soon!
Well that is about it. I hope to be back soon with a fairly detailed post on the decoration that I made to go above the crib in place of a mobile. It is seriously one of my favorite projects so far so I can't wait to share!
Wednesday, June 25, 2014
Gallery Wall Reveal
The day has finally come when I get to reveal my gallery wall project that I have been working on for several months now. There is one part of it that I might redo eventually (we'll get to that later) but for now I am calling it done. If you can't wait to see the finished product just scroll down a little bit but I thought I would start with a little bit about how I decided to arrange everything and how I hung the items.
I started by spending an evening trying different arrangements with the items on my living room floor. I know, I know you are thinking that I have a super exciting life now. I took photos of each arrangement so that I could compare them later to pick my favorite one. The image below is of my favorite arrangement.
For the smaller, lighter items I decided to try these Command picture hanger strips.
They were really easy to use. I just followed the instructions on the package. They seem to be working really well. The items are really secure.
For the other items I just used regular picture hangers. And now for the big reveal.
You may have noticed a couple of extra items that weren't in my original arrangement. When I finished putting everything up, there were a few empty spaces that were bothering me so I decided to add a couple more items. The family name sign in the middle was the first one. I used a burlap canvas that I got at Hobby Lobby and my Silhouette Portrait to make a stencil for the letters out of contact paper. Check out the posts on North Dakota Wood Art and the Etched Glass Window Frame that I have linked at the bottom to find out more about how I did it. This is the project that I might redo because I had a little trouble keeping my letters straight and the crookedness will probably drive me crazy eventually.
The font that I used for our name is an Art Deco font called Hill House. The font that I used for the numbers is another Art Deco font called Gatsby.
My other addition is just a cute notecard from Target that I put in a frame from TJ Maxx.
I like the colors, the birds and the quote.
Here is a look at the other purchased items in my gallery wall. All of the items are in frames that I bought on clearance at places like Gordmans, Target, and TJ Maxx. The first two are book cover art prints from Zazzle.
The Alice and Wonderland print is from a really cool Etsy seller that prints on antique book pages: PRRINT.
Here is look at what my gallery wall looks like from the outside of the house.
Let me know what you think of my gallery wall. I am so excited that it turned out so well.
I am going to take a break from porch projects for awhile so my next project involves some more organizing in my craft close. Check back next week for that project. In the meantime you can look at the tutorials for some of the art pieces in my gallery wall. Just click on the pictures below.
I started by spending an evening trying different arrangements with the items on my living room floor. I know, I know you are thinking that I have a super exciting life now. I took photos of each arrangement so that I could compare them later to pick my favorite one. The image below is of my favorite arrangement.
Next I took some newspaper and traced each item, cut them out, and then hung them on the wall with painters tape in my chosen arrangement.
I hung the pieces using several methods. The floating bookshelves were hung with the screws provided. The window frame came with some pretty heavy duty brackets so I chose to put a couple of screws in the wall to hang it on. I used the painters tape measuring method to get the right screw placement.
I just took that piece of tape and put it on the wall, made sure it was level and drilled holes for the screws. It is a super easy fail proof method.For the smaller, lighter items I decided to try these Command picture hanger strips.
They were really easy to use. I just followed the instructions on the package. They seem to be working really well. The items are really secure.
For the other items I just used regular picture hangers. And now for the big reveal.
You may have noticed a couple of extra items that weren't in my original arrangement. When I finished putting everything up, there were a few empty spaces that were bothering me so I decided to add a couple more items. The family name sign in the middle was the first one. I used a burlap canvas that I got at Hobby Lobby and my Silhouette Portrait to make a stencil for the letters out of contact paper. Check out the posts on North Dakota Wood Art and the Etched Glass Window Frame that I have linked at the bottom to find out more about how I did it. This is the project that I might redo because I had a little trouble keeping my letters straight and the crookedness will probably drive me crazy eventually.
The font that I used for our name is an Art Deco font called Hill House. The font that I used for the numbers is another Art Deco font called Gatsby.
My other addition is just a cute notecard from Target that I put in a frame from TJ Maxx.
I like the colors, the birds and the quote.
Here is a look at the other purchased items in my gallery wall. All of the items are in frames that I bought on clearance at places like Gordmans, Target, and TJ Maxx. The first two are book cover art prints from Zazzle.
The Alice and Wonderland print is from a really cool Etsy seller that prints on antique book pages: PRRINT.
Here is look at what my gallery wall looks like from the outside of the house.
Let me know what you think of my gallery wall. I am so excited that it turned out so well.
I am going to take a break from porch projects for awhile so my next project involves some more organizing in my craft close. Check back next week for that project. In the meantime you can look at the tutorials for some of the art pieces in my gallery wall. Just click on the pictures below.
![]() |
![]() ![]() ![]() ![]() ![]()
Linked to That DIY Party and City of Creative Dreams
|
Subscribe to:
Posts (Atom)