The nursery has been finished for several weeks now. I hope to have the big reveal ready for you in the next post but I thought that I would share some small finishing touches in the nursery. First of all, I purchased a can of gold spray paint for the curtain rod in the room but I got so much use out of it beyond that. Above you can see the fox lamp that I purchased at World Market. He used to be black but that was boring so I spray painted him gold. Isn't he cute?
I also spray painted the cheap plastic frame that houses the "Lefse Norwegian for Love" print.
You may remember the frame that I spray painted gold to add to the wall with the string art. I said in that post that the photo in the frame was just a placeholder. Here is the updated frame:
I love this photo of my grandpa and grandma and my grandpa's siblings and their spouses. My Great Aunt Lyla is on the right side. The frame mat is just some scrapbooking paper that I had on hand.
I also spray painted the top of this canister that I found at HomeGoods. The handle is a cabinet knob from Hobby Lobby that I glued to the canister top with E6000 glue. I have little things stored in the canister like a thermometer, pacifiers, nail clippers, and a nasal aspirator.
I also wanted to finally update you on the cloth diaper storage in the room. We have decided to go the cloth diaper route part time. We plan on using cloth diapers when we are at home with baby. To store the diapers I found some media storage baskets at Target
To attach them to the wall I needed anchors, washers and screws.
I started by cutting pieces of newspapers to the size of the bottom of the baskets. I then pushed the screws through each of the 4 corners for each basket. I pushed the newspaper on to the screws to mark the spots where I needed to drill.
Then I taped the newspaper pieces to the wall, making sure to check that each one was level and evenly spaced.
I drilled holes for the anchors in the spots that I marked and removed the newspapers. Then I inserted the anchors.
Then I just screwed the baskets to the wall placing a washer between the screw head and the basket. The baskets fit about 6 BumGenius diapers. The diapers pull out easily without taking all of the other diapers with them.
For a diaper pail we decided to use two small SimpleHuman trash cans: one for cloth diapers and one for disposable diapers. I made the labels using my Silhouette Portrait and gold adhesive vinyl. The cloth diaper pail is lined with a reusable liner.
I finally filled the bookshelf in the room. I found the storage baskets at HomeGoods. Two of them are currently empty but the other one is filled with toys that my nieces have outgrown thanks to my awesome sister-in-law. The storage boxes are from Michaels and contain manuals from all the new gadgets that we needed for this little baby. Well that is all for now but the big reveal is coming soon so stay tuned!
Saturday, July 18, 2015
Wednesday, July 15, 2015
Silhouette PixScan and Some Small House Updates
I am no stranger to making appliqued onesies. They are so great for using up fabric scraps. Here are some other onesies I have made:
When Silhouette came out with their PixScan technology I immediately thought of how much material I could save using it. It also saves time because I can cut all the fabric parts for applique onesies at the same time. Here is a run down of how PixScan works.
I laid my fabric scraps with the heat n' bond backing on the PixScan mat.
Then I took a photo of the mat with my iPhone.
Then I uploaded the photo into the Silhouette design software by clicking the PixScan icon. Next I just dragged my designs over the correct fabric square. When you go to cut your designs, the Silhouette reads the registration marks on the PixScan mat and then cuts your designs. It was seriously that easy! There are many other uses for PixScan but this one will certainly be one of my favorites.
I also have some small house updates for you today. They aren't super exciting but I am happy to have them taken care of before baby gets here.
First of all, about a month ago my husband decided to finish installing the quarter round in the master bedroom. We started this project a LONG time ago. Unfortunately we cut half of the pieces incorrectly and so we had to order more quarter round. Lowes took forever to get it in and then they lost our order in the store so that when we went to pick it up, no one could locate our order! By that time it was winter and we didn't want to be going back and forth between our unattached garage to cut the pieces. I am so glad that my husband finished it because I was tired of looking at those quarter round pieces just hanging around.
I also finally hung my degrees up in the office. As a gift for my masters commencement my parents paid for the custom framing of my undergrad and masters degrees. I didn't want to hang them up until the office was painted so that is why it took so long (I graduated with my masters 2 years ago)
That is it for my quick post today. Today I also edited the photos for a post on all the finishing touches in the nursery and I also took photos of the nursery so that I can post the big nursery reveal soon! Check back in the near future for those posts.
When Silhouette came out with their PixScan technology I immediately thought of how much material I could save using it. It also saves time because I can cut all the fabric parts for applique onesies at the same time. Here is a run down of how PixScan works.
I laid my fabric scraps with the heat n' bond backing on the PixScan mat.
Then I took a photo of the mat with my iPhone.
Then I uploaded the photo into the Silhouette design software by clicking the PixScan icon. Next I just dragged my designs over the correct fabric square. When you go to cut your designs, the Silhouette reads the registration marks on the PixScan mat and then cuts your designs. It was seriously that easy! There are many other uses for PixScan but this one will certainly be one of my favorites.
I also have some small house updates for you today. They aren't super exciting but I am happy to have them taken care of before baby gets here.
First of all, about a month ago my husband decided to finish installing the quarter round in the master bedroom. We started this project a LONG time ago. Unfortunately we cut half of the pieces incorrectly and so we had to order more quarter round. Lowes took forever to get it in and then they lost our order in the store so that when we went to pick it up, no one could locate our order! By that time it was winter and we didn't want to be going back and forth between our unattached garage to cut the pieces. I am so glad that my husband finished it because I was tired of looking at those quarter round pieces just hanging around.
I also finally hung my degrees up in the office. As a gift for my masters commencement my parents paid for the custom framing of my undergrad and masters degrees. I didn't want to hang them up until the office was painted so that is why it took so long (I graduated with my masters 2 years ago)
That is it for my quick post today. Today I also edited the photos for a post on all the finishing touches in the nursery and I also took photos of the nursery so that I can post the big nursery reveal soon! Check back in the near future for those posts.
Wednesday, July 8, 2015
Photo Projects in the Nursery
The first project was to complete the decor for the floating shelf in the nursery. It looked like this the last time I posted it:
I had found some lovely frames at TJ Maxx but they were still empty at that point in time. I decided to fill those frames with some old photos of my Great Aunt Lyla who we are naming our daughter after.
It was a bit tricky to fill those little frames but after some trial and error I was able to get the photos to fit the way I wanted them to.
I just love how this little shelf turned out especially since it was not in my initial plans for the nursery. We received the shelf as a wedding gift but never put it up because we never found a suitable place for it. It turns out that it was just waiting to be in this room for our little one :).
Now on to the second project in this post. The wall with the cubby display case seemed a little bare.
So I decided to turn the space around the case into a photo wall. I found photos of various family members, made them black and white, and then ordered 4 by 6 prints from Shutterfly. I found some sparkly hemp twine at Hobby Lobby and some fancy pushpins at Target. I also picked up some mini clothespins from Hobby Lobby. I decided that I wanted the clothespins to have an aged look to go with the vintage feel of the room.
I placed a piece of steel wool in a jar and poured vinegar over it.
I probably just needed to let it sit overnight but I forgot about it so it actually sat for several days. I then removed the steel wool and put the clothespins in the jar for a minute. I removed them after about a minute and let them dry on a paper towel.
I think they turned out perfectly. To make the photo wall I strung pieces of the twine across the wall and attached them to the wall with the push pins.
The push pins are gold with milk glass tops. Is it weird that when I thought about finding fancy push pins that I immediately thought of Target? They have some seriously fancy office supplies at Target folks.
So here is how that corner of the room looks now. You know that I was tired when I took these pictures because I didn't even bother to clean the supplies off of the changing pad. Oops!
I love the personal touch that the photos add to the nursery. I have quite a few posts that are ready to share in the next few weeks. It will just be a race to see whether I can get them all posted before baby girl decides to arrive!
Sunday, July 5, 2015
3 Years!
It is hard to believe that we have been living in our house for 3 years now. Each year I like to recap the big projects that have happened in our house over the past year. I'll start with the exterior. Last summer we had a issue with our roof sliding off in sheets of shingles.
It was not a pretty sight. We were hoping to make it a few more years in the house before having the roof replaced but I guess our roof just decided that it was done. So we bit the bullet and got it replaced.
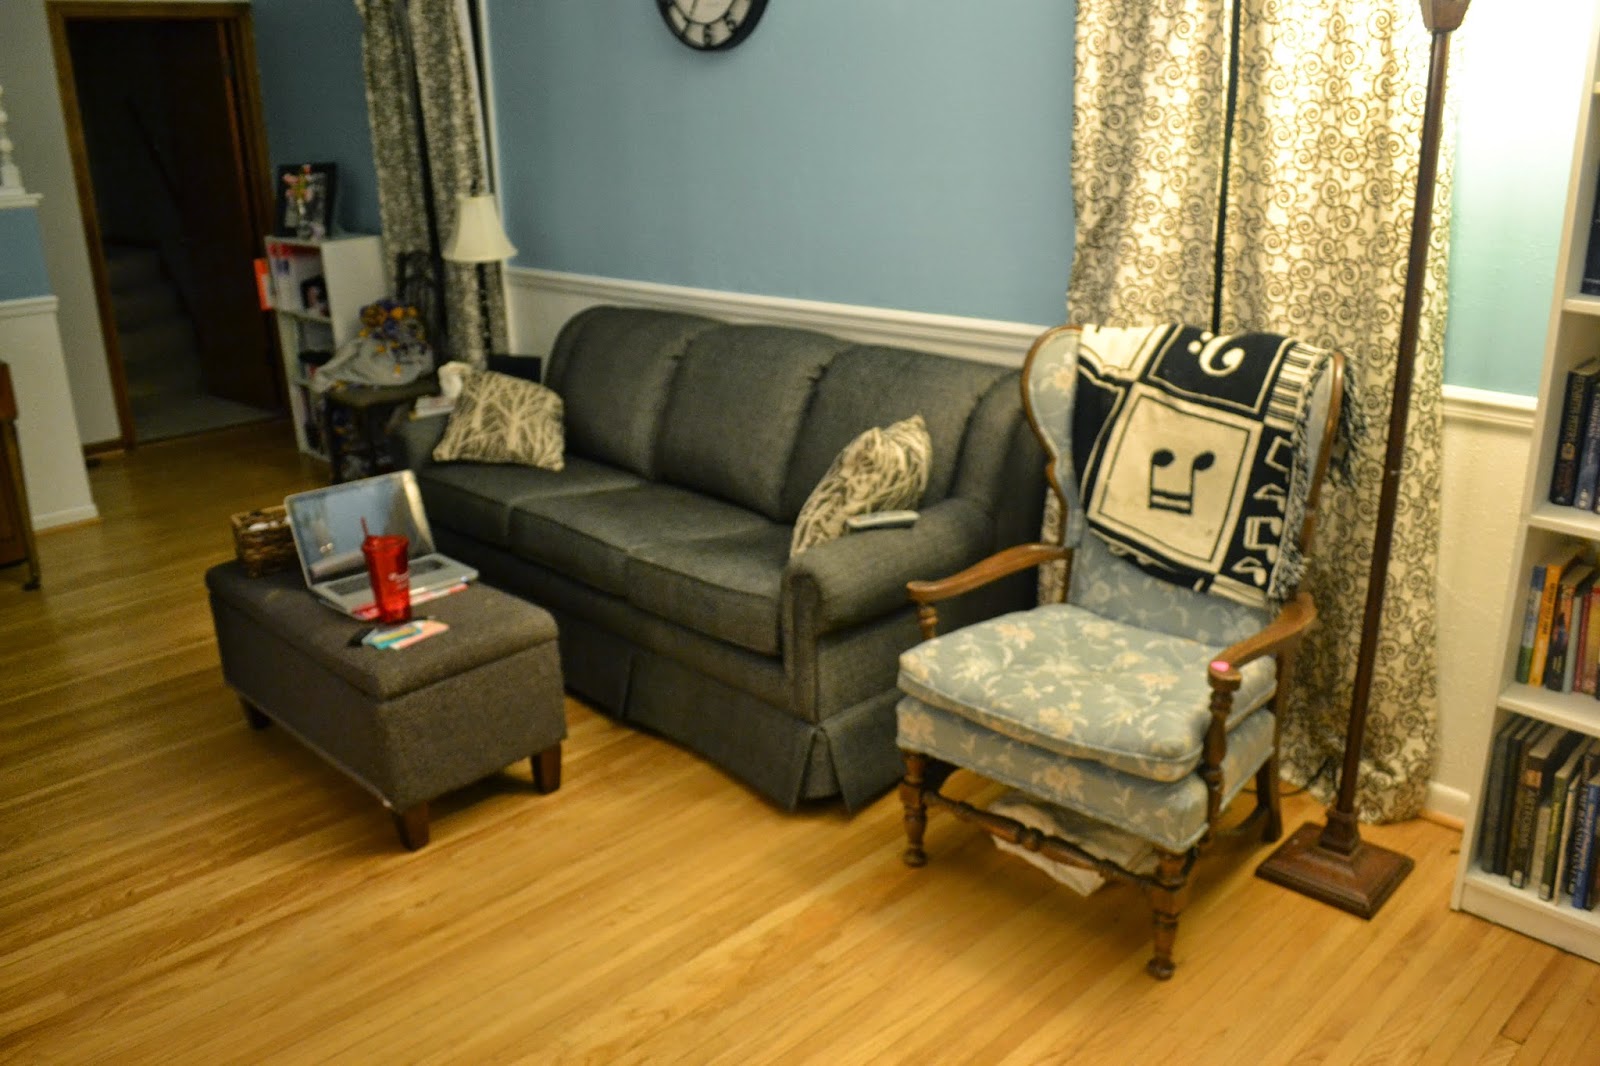
Another part of the house that saw some major changes this year was the living room. We painted the living room and put up a chair rail before we moved in and then I made some curtains in November of that year but other than that the room stayed the same until this past fall/winter. First we bought a new couch that was smaller than our previous one so that it fit the shape of the room better.
Then we purchased an Expedit shelving unit from Ikea that we turned into a media console. You can check out the hack here: part I and part II.
We also purchased a new TV and then I stenciled some storage boxes for the console.
Next I made a skyline painting to go over the couch.
Finally I completed a small update to the living room curtains by adding grommets.
So without further ado, here are some photos of the living room in its current state. I have also updated the house tour photos for the living room since the previous pictures didn't even include the living room curtains!
The next room that has gone through the most drastic change over the past year is our guest bedroom.
The only thing that had been done in this room previously was painting the walls and trim. I had always anticipated that it would become a nursery so I didn't really try to do much else with it in the meantime. I am not going to update the house tour or post a lot of pictures of the room until I do the big reveal but I thought I would give you one sneak peek photo so you could see the drastic change.
Just a little bit of a difference, right? A few other parts of the house have gotten some small changes over the past year. In the spring, I added some drawer inserts to the window seats on the porch.
I also painted the office.
So that is a recap of the year. We are getting to the point in our diy home journey where major room overhauls are mostly a thing of the past but there could be one drastic change to the addition (office and bonus room) over the next year. Stay tuned for that!
It was not a pretty sight. We were hoping to make it a few more years in the house before having the roof replaced but I guess our roof just decided that it was done. So we bit the bullet and got it replaced.
Another part of the house that saw some major changes this year was the living room. We painted the living room and put up a chair rail before we moved in and then I made some curtains in November of that year but other than that the room stayed the same until this past fall/winter. First we bought a new couch that was smaller than our previous one so that it fit the shape of the room better.
Then we purchased an Expedit shelving unit from Ikea that we turned into a media console. You can check out the hack here: part I and part II.
We also purchased a new TV and then I stenciled some storage boxes for the console.
Next I made a skyline painting to go over the couch.
Finally I completed a small update to the living room curtains by adding grommets.
So without further ado, here are some photos of the living room in its current state. I have also updated the house tour photos for the living room since the previous pictures didn't even include the living room curtains!
The next room that has gone through the most drastic change over the past year is our guest bedroom.
The only thing that had been done in this room previously was painting the walls and trim. I had always anticipated that it would become a nursery so I didn't really try to do much else with it in the meantime. I am not going to update the house tour or post a lot of pictures of the room until I do the big reveal but I thought I would give you one sneak peek photo so you could see the drastic change.
Just a little bit of a difference, right? A few other parts of the house have gotten some small changes over the past year. In the spring, I added some drawer inserts to the window seats on the porch.
I also painted the office.
So that is a recap of the year. We are getting to the point in our diy home journey where major room overhauls are mostly a thing of the past but there could be one drastic change to the addition (office and bonus room) over the next year. Stay tuned for that!
Subscribe to:
Posts (Atom)