Sunday, January 5, 2014

NYE Party

Well, this is my last blog post of my Christmas break.  I actually have an extra day tomorrow because of the extremely frigid weather in the Northern midwest. All schools in Minnesota, pretty much all of North Dakota, and some of South Dakota have been cancelled.  We are talking -40 to -60 wind chills. Crazy cold!  

Another cold night recently was New Year's Eve.  The past 3 years, my husband and I have hosted a NYE party at our house.  It actually would have been the last 4 years but a New Year's blizzard ruined our plans the first year.  Every year I step it up a little bit and this year was the best year yet.

I thought that I would write a post on the elements that made up our NYE party in hopes that it might inspire you if you plan one next year.  First up, the tablescape. 
Last year, I planned on writing a blog post about our NYE party but sadly I forgot to take a lot of pictures.  This year I made the table really pretty so I am glad that I remembered to take a ton of photos.

Here are a few pictures of the centerpiece.

For the centerpiece I used mostly items I had around the house.  That wood piece was something that I bought a long time ago that has sat on either my dining table or coffee table in the past.  It is usually filled with various types of decorative balls.  The sparkly pine cones were taken from my Christmas apothecary jar arrangements.  The rest of the stuff was clearance Christmas decorations from Target.  The bottles are from my antique bottle collection that sits on the chest on the porch.  The chevron straws are from Target.  The 2014 was made from glittery card stock that I cut with my Silhouette.
I found the gold table cloth from TJ Maxx for $25.  I will definitely use it for other occasions so I thought that it was worth the price.  I made the table runner from fabric that I purchased at Joann's.  I used the same mitered corner technique from the napkins in this post.  The sparkly black ribbon is from Hobby Lobby.


I also burned some candles in my Nate Berkus candelabra from Target which I placed on a gold charger that I bought a few years ago.  I decided to be fancy and make a little tower with the plastic champagne glasses in the corner of the table.

Now onto the food.


Here is the menu.  I have included links to recipes for the ones that I found on Pinterest.

Menu
Meatball sliders-recipes used are crockpot meatballs and 40 minute slider buns
Deviled Eggs
Bacon Cheddar Cheese Ball with crackers
Veggies with Dill Dip
Cowboy Caviar with chips (this is a must for New Year's with the lucky black-eyed peas)-my recipe is one that I got from my mom but there are many variations of this floating around the internet
Crockpot Hot Chocolate with various add-ins

All of the food seemed to be well received.  I always make a ton no matter how many people are coming.  In addition to the food, the party included playing some games and a new addition this year-a photo booth.

This was very simple to put together. I bought some more black and white chevron fabric and hung it from one of our curtain rods.  I made the props using my Silhouette and I bought the shapes from the Silhouette online store.  I also saw free printable props on Pinterest so if you don't have a cutting machine you could still make them.  I cut them out on glitter card stock which I purchased at Hobby Lobby.  I used the same black and gold chevron straws from the centerpiece for the sticks to hold some of the props.  I used my DSLR to take the photos but any camera would work.  It was kind of a last minute idea but everybody had fun with it.  
So there you have it.  That is how we throw a New Year's Eve party at my house.  Of course the evening included counting down until the ball drop and toasting the New Year.  So my last picture says what I would like to wish all of you.  Here's to a great 2014!

Monday, December 30, 2013

Things I Can Actually Sew II

Anther post!  I love Christmas break!  Alright, so my my first installment of novice sewing tutorials was pretty popular so I thought I would do a part II with some more projects that I have taken on recently.

First of all I would like to share some sew-in labels that I made with my Silhouette Portrait.  Some time ago I made these iron on labels.
I decided that I needed some sew-in labels for things like scarves and smaller items.  I used the sketch feature and the same font on the sew-in labels and then put a simple dashed border around the words. I then reflected the image so that when I folded the labels the words would be printed on both sides.  Here they are on some of my burp clothes. 
I have been kind of crazy with the burp clothes lately but I want to have a supply on hand for when I find out that someone is having a baby
I have found that pretty much every fabric looks cute as a burp cloth!

The first tutorial that I tried was a king crown.  I teach music at a Christian school and a Nativity pageant is a part of my big Christmas program every year.  A few years ago, one of my students stepped on the plastic crowns for the wise men and broke them.  I decided to replace them with felt crowns.
I used this tutorial from the blog Small Things.

The tutorial tells how to insert elastic into the crowns but I wanted to make them really adjustable since I will have different kids playing the wise men each year.  I decided to put velcro on the backs.
I then added some glittery gold trim along the bottom and some plastic gems.  They looked so cute on my wise men this year! I am looking forward to using them for many years to come.
Next up is actually a sewing project that I created sans tutorial.  My classroom gets super dusty and my xylophones would be covered in dust no matter how many times I dusted.  My cooperating teacher for my student teaching had some adorable dust covers for her xylophones and I wanted to create some for mine.  I couldn't find a tutorial online so I decided to make it up.  I looked at a few tutorials for ironing board covers since the idea is basically the same.  I did have process pictures but since this project was actually completed this summer, they were lost with my old mac book.
Basically, I measured the tops of my xylophones with the bars on, added about 2 inches on each side to the dimensions and then made a casing for elastic.  Super simple and super cute.  Oh and I suppose I should share some pics of my classroom while I am on this subject.

The color scheme in my classroom is orange, blue, and brown.  Also, I am obsessed with owls so you can find them throughout my classroom.  The only thing you can't see from these pictures is the front of the room where I have my two white boards (one lined and one not) and my piano.

The third sewing project that I want to share is a tutorial for napkins.  This is my kind of project because it involves straight lines which I am good at sewing most of the time.  The only tricky part was the mitered corners but I found a couple of tutorials that made it super simple.  The first method that I tried was from the blog No Big Dil found here.  The second one that I tried and the one that was easier for me was from a blog that has an expired domain name but it involved pressing and then trimming the corners and pressing the corners and then the edges to create the mitered corner.  I included the first tutorial because you might find that one easier.
I made two sets of napkins from some fabric that I found.  So easy and so classy.


I may actually get one more post in before this break is up.  My husband and I are hosting our third NYE party so I hope to write a post with some decorating and food ideas.  We'll see what happens.

Friday, December 27, 2013

Three Big Future Projects

I have been posting some small projects since my completion of the furniture and walls in our bedroom but I do have some more large projects in mind.  Here is a look at three of those projects, my ideas for the completion of them, and a timeline for when I want to complete them.  I hope this post keeps me accountable and inspires me to get on them.

First up is my craft closet.  Right now this closet is a giant disaster.

So this closet may have functioned as a clothes closet for the previous owners.  It actually had another rod that was mounted about a foot under the other one.  I removed that one so that I could hang that shelf thing that is attached to the rod.  The bottom photo shows the disaster area floor. This closet does not work for me at all the way it is configured.  It needs shelves and I found a website that can cut wire shelving to custom lengths that charges by the foot.  I think it will be a cost effective solution for this space.  Here are some other ideas that I have found on Pinterest.
From Craftholics Anonymous courtesy of Lina from Fancy Frugal Life
I like the fabric storage idea in the above picture.  I also like the spray painted spool holder, so cute!
Here is another cute idea for spool storage.
I love the idea of using tension rods for ribbon storage.  It is so cute and so functional.
This idea came from the blog Mad in Crafts
This is a great idea for storing craft paint.  I even have some of these wire cube shelves lying around my house!
I love this idea for storing vinyl for my Silhouette Portrait.
Using contact paper without removing the backing is a clever way of covering wire shelving.

I hope to complete this project by March because I need to have better storage in order to continue completing projects for this blog!

My next big project will be refinishing my dining room table and chairs.  The purchase of new chairs for the ends of my table has fueled my desire to move this project up on my priority list.  I have been eying some dining chairs from Pier 1 for quite a long time.  They were a splurge for me but thanks to a Christmas gift from my father-in-law and a 20% off total purchase coupon from Pier 1, I decided to take the plunge and buy them. Here they are in the dining room.

I love the purple and gold damask on the backs.  The purple is even richer in person.  Just ignore the cat hair in the bottom photo.  My cat definitely approves of these chairs!

My plan for my beautiful table (which was a Craigslist score) is to stain it a little bit darker brown, like the legs of my new chairs.  I also would like to make 2 more leaves for the table.  The table came with three leaves but 2 of them were made by the previous owners of the table and were warped.  I would like to find a fabric that coordinates with my new chairs to recover the pads of my other chairs.  I'm thinking a dark purple or maybe a gold fabric.  I would like to start this project sometime in the spring.

My third project is the largest of them all.  Remember how I have this lovely floor in my bedroom.  
Well the rest of the upstairs besides the bathroom has this ugly, old carpet.  
I've pulled up some loose corners and there is definitely the same floor as our bedroom under there.  I want to pull it all up and refinish the wood floors.  This project definitely won't happen until this summer since it will take some significant time and will require open windows to air the floors out as they are being finished.  This project makes me the most nervous.  But I was nervous about the kitchen tile and that turned out fabulous so here's hoping it will go well.

Next up on the blog will be a post about some sewing project that I have been working on lately.  It will be part 2 of my popular blog post: Things I Can Actually Sew.

Sunday, December 22, 2013

Christmas Card Display Frame


Well it is officially Christmas break.  I am so excited to have 2 weeks off after 2 busy weeks filled with two big Christmas concerts, a piano recital, and a tour with my 4th and 5th grade choir.  I am so proud of how all my students performed but I am definitely in need of this break.

The break means that I have some time to complete some projects as well as share some that have already been completed.  Last weekend I made a simple Christmas card display out of a frame, some spray paint, and some ribbon that I had lying around the house.  In the past, I have taped Christmas cards to the inside of our front door but after seeing a few different ideas for displaying Christmas cards on Pinterest, I thought I would create something cute of my own.


I started with an open frame that I bought at 50% off at Michael's.  I was originally going to paint it gold with the Vintage Gold Martha Stewart paint that I had leftover from my armoire project.  But I thought about my lovely aqua walls in the living room and knew that I had to paint it bright red.  I love the combo of red and aqua!  So I picked up a $5 can of red Valspar spray paint at Lowes.
I then applied 3 thin coats of the spray paint to the frame and stuck it on our porch to off gas.
Then I gathered some ribbon that I had laying around (most of the time I buy ribbon on clearance when I am at craft stores so I always have a nice supply on hand).  I used a glue gun to attach the ribbon pieces to the back of the frame.
And here is what it looks like in that corner of the room.
I found some cute mini clothes pins at Hobby Lobby which I used to hang the cards on the ribbons. There are a few more cards on there now. Have a Merry Christmas everyone!  I hope to have a few more posts up before my two week break is finished.  

Friday, November 29, 2013

2 More Bedroom Furniture Makeovers

The following post is certainly not what I intended it to be.  I had very detailed pics of the process that I used to makeover my armoire but unfortunately my MacBook had other plans when it crashed.  So some of the process will have to be left to your imagination.

Here is what my armoire looked like before (this is not my actual armoire but one very similar to it):
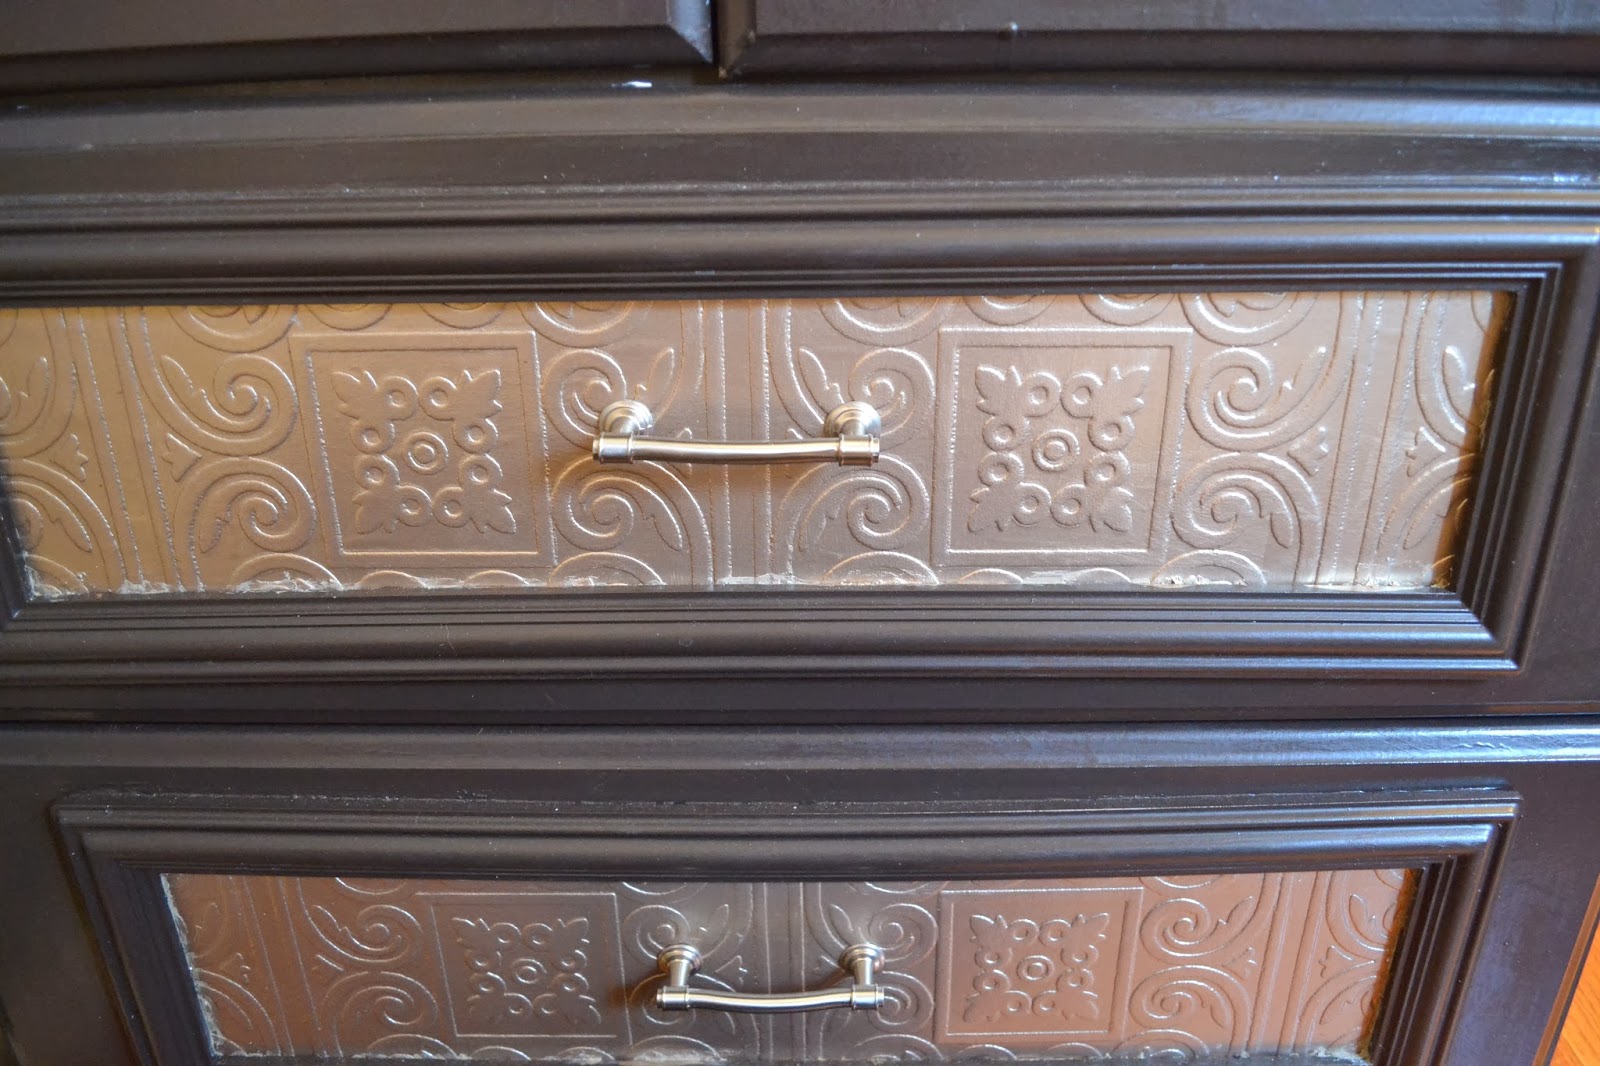
It was a very generic piece of furniture that I bought as a cheap solution to my lack of clothing storage in our rental.  Here is what it looks like now (although it is hard to really capture it in photos, it looks so much more awesome in person):


Basic steps of this process were similar my nightstand makeover from awhile ago.  I was a little more careful with the sanding step on this piece though because it is laminate.

Other supplies that I used for this project were:
1. moulding frames bought on clearance at Lowes
2. paintable textured wall paper from Amazon
3. Liquid Nails adhesive for small indoor projects
4. Martha Stewart Living Metallic Paint in Vintage Gold from Home Depot.
5. Spray adhesive from Hobby Lobby
6. Paintable clear caulk

After I had painted the whole piece I cut the wallpaper to the dimensions of the inside back of the part with the doors.  I put it on using spray adhesive.  I then painted it with 2 coats of the Martha Stewart Vintage Gold Paint.

For the panels on the doors and drawers, I did some calculation to make sure they were centered, cut the wallpaper pieces to the size of the frames and glued them on using the spray adhesive.  I then painted them with two coats of the Vintage Gold paint.  I painted the moulding frames and once they were dry I put a line of Liquid Nails all around the frames and attached them to the doors and drawers.  After the Liquid Nails was dry, I caulked around the frames to fill in any gaps.  After the caulk was dry I touched up the paint.  The last step was applying the layers of polyacrylic just like the nightstands.

This project took forever.  I think I worked on it for a month off and on.  I forgot to take a pic of the inside but it looks pretty neat with the wallpaper.  I am super excited by how it turned out.  It is now such a unique piece of furniture that ties in perfectly with the other pieces in the room.

The second piece of furniture that I made over was my husband's dresser. You can see it in this terrible photo from our rental house.
It was also a very generic piece of laminate furniture that he has had since college.  I did a very simple makeover on this one since it is my husband's and just painted it and added knobs that match the nightstands.

It is super simple but chic.  The color reads a little darker in person.  I think that it looks fantastic with the newly painted Ralph Lauren Washboard walls.  Also, you can see the few pieces of quarter round that have been installed in these pictures.  I am still waiting for the rest of the quarter round to come in.  It was supposed to be here by the 16th of November so I am a little annoyed with Lowes right now.  

The room is coming together but there is still so much to do including installing the curtain rod, making curtains, finding new bedding for the bed, etc.  Hopefully it won't take me so long to write another post but I can't guarantee it since December is such a busy month for music teachers.  Until next time here is a look at the furniture makeovers in this room.
Related Posts Plugin for WordPress, Blogger...